Customer Management System Spreadsheet Template
This comprehensive spreadsheet is designed to provide you with a clear and concise overview of your customer data, allowing you to make informed decisions about your business.
You can watch the YouTube video below if you don't want to read the whole page. Let's start.
HOME PAGE
The home dashboard includes charts that are linked to other sheets, and they are automatically updated based on changes in the data on those sheets.
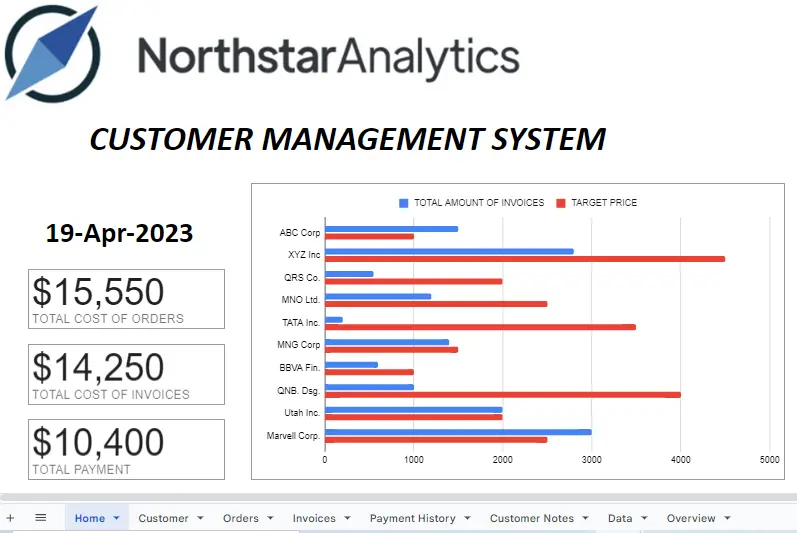
To get today's date on this page, simply type =TODAY() in the formula bar on the left top side of the page. You can customize the appearance of the cell by merging cells and using formatting tools. To view the formula and formatting options, click on the cell.
The "TOTAL COST OF ORDERS" scorecard chart shows the sum of data from the "TOTAL COST OF ORDERS" column in the table found on the Orders page.
The "TOTAL COST OF INVOICES" scorecard chart shows the sum of data from the "TOTAL COST OF INVOICES" column in the table found on the Invoices page.
The "TOTAL PAYMENT" scorecard chart shows the sum of data from the "TOTAL PAYMENT" column in the table found on the Payment History page.
The bar chart displays the total amount of invoices and target price values of the companies. The names of the companies come from the COMPANY column on the Customer page, the TOTAL AMOUNT OF INVOICES values come from the TOTAL COST OF INVOICES column on the Invoices page, and the TARGET PRICE values come from the ESTIMATED SALE CAPACITY column on the Customer page.
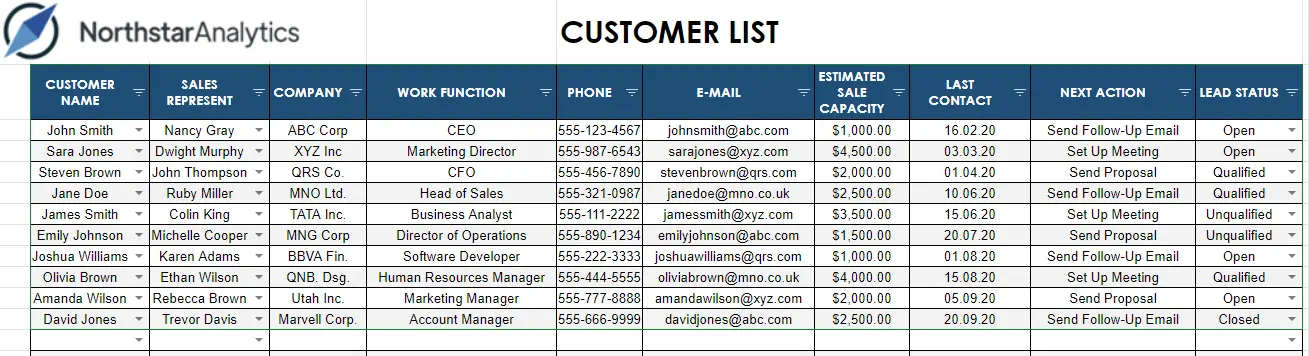
CUSTOMER PAGE
This page provides a comprehensive overview of the customers in the system. This page includes the customer’s name, address, contact information, as well as any other relevant information about the customer.
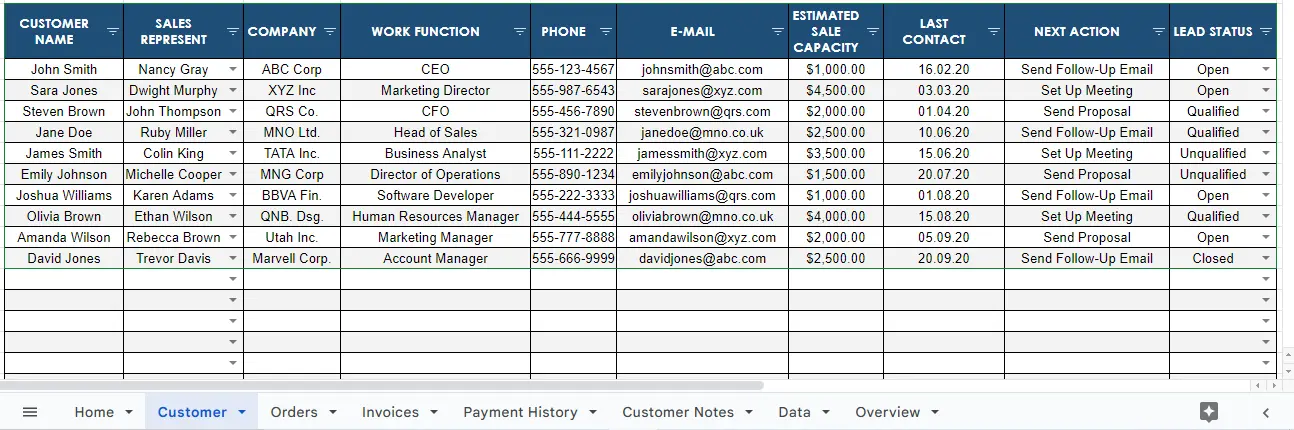
On the Customer page, you will discover a table featuring several fields, such as customer name, sales representative, company, job function, phone number, email address, estimated sales capacity, last contact, next action, and lead status. Each field's data is entered manually, except for the lead status, which is populated through dropdown cells derived from the Customer Name field in the Data table.
- CUSTOMER NAME: This column is used to enter the name information of customers.
- SALES REPRESENTATIVE: This column is where the name of the sales representative is entered.
- COMPANY: This column is used to enter the name information of the company that is our customer.
- WORK FUNCTION: This column is used to enter the job information of the customer.
- PHONE: This column is used to enter the phone number of the customer. E-MAIL: This column is used to enter the email of the customer.
- ESTIMATED SALE CAPACITY:
- LAST CONTACT: This includes the date of the last contact made with the customer.
- NEXT ACTION: This includes the information about the next action to be taken for the customer.
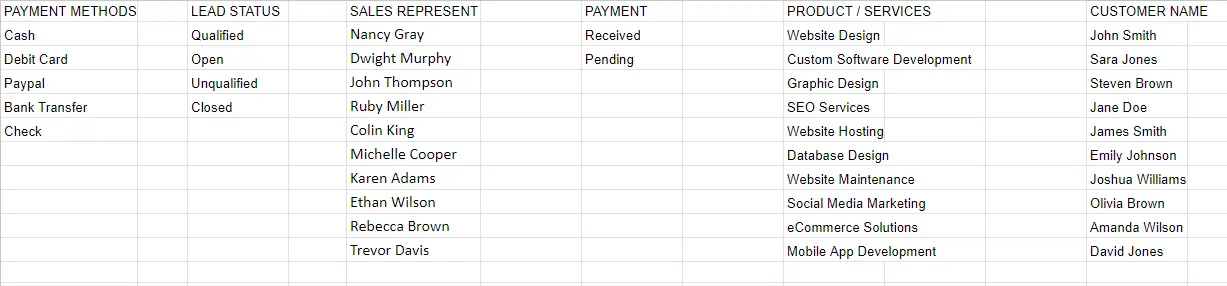
- LEAD STATUS: "Lead Status" refers to the current stage of a potential customer in the sales process. It is used to track the progress of a lead through the sales pipeline and typically includes categories such as "Qualified," "Open," "Unqualified," and "Closed."
Qualified: A lead that has met certain criteria and has been deemed likely to become a customer. For example, they may have expressed interest in the product or service, provided contact information, or demonstrated a need for the offering.
Open: A lead that has been identified but has not yet been qualified or contacted by a sales representative.
Unqualified: A lead that has been deemed unlikely to become a customer based on certain criteria, such as lack of interest, budget constraints, or being outside the target market.
Closed: A lead that has been converted into a customer or has been disqualified and is no longer being pursued.
The lead status helps sales teams to prioritize their efforts and focus on the leads that are most likely to convert into customers.
ORDERS PAGE
This page provides an overview of all orders placed by the customer. This page includes the order information, the products ordered, and the order amount.
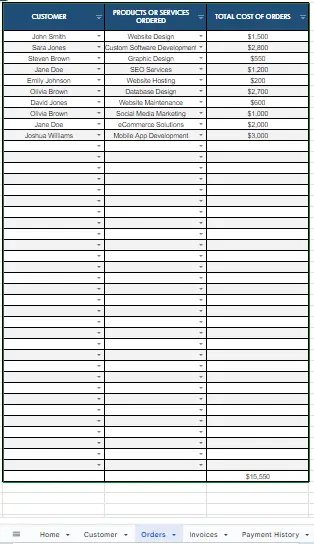
- CUSTOMER: This column contains the name information of the customer. The data comes from the CUSTOMER NAME field in the data table.
- PRODUCTS OR SERVICES ORDERED: This column contains information about the products or services ordered by the customer. The data comes from the PRODUCT/SERVICES field in the data table.
- TOTAL COST OF ORDERS: This column is where the total cost of the order is entered.
The bottommost value represents the aggregate sum of the TOTAL COST OF ORDERS column. The scorecard charts for the TOTAL COST OF ORDERS on the home page are derived from this particular value.
INVOICES PAGE
This page provides an overview of all invoices associated with the customer. This page includes the invoice number, the date of the invoice, the invoice amount, and any other relevant information.
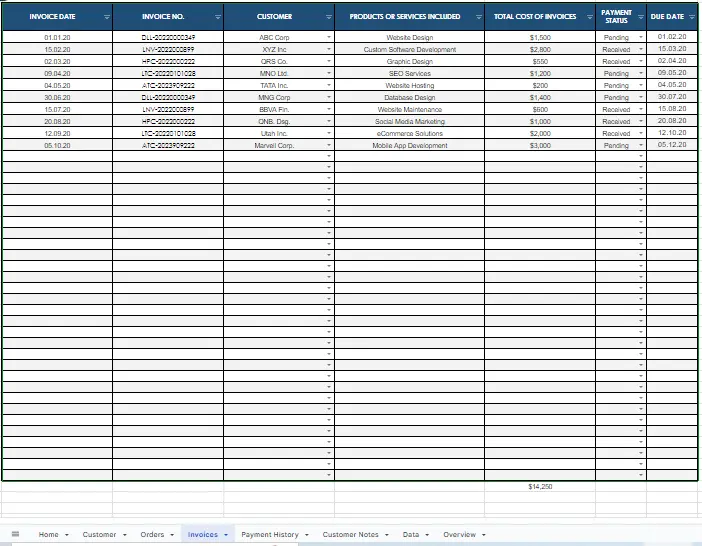
- INVOICE DATE: This column provides the date when the invoice was generated.
- INVOICE NO.:This column provides the invoice number.
- CUSTOMER: Contains the name of the customer company. It is derived from the data in the COMPANY field in the Customer table.
- PRODUCTS OR SERVICES INCLUDE: This column provides information about the work done for the customer.
- TOTAL COST OF INVOICES: This column provides the total cost of the work done.
- PAYMENT STATUS: This column provides information about the payment status of the invoice. It is derived from the data in the PAYMENT field in the Data table.
- DUE DATE: This column provides the deadline for the payment of the invoice.
The bottommost value represents the aggregate sum of the TOTAL COST OF INVOICES column. The scorecard charts for TOTAL COST OF INVOICES on the home page are derived from this particular value.
When hovering over the value, the formula used in the formula bar becomes visible.

PAYMENT HISTORY
This page provides an overview of the customer’s payment history. This page includes the date of the payment, the amount paid, and any other relevant information.
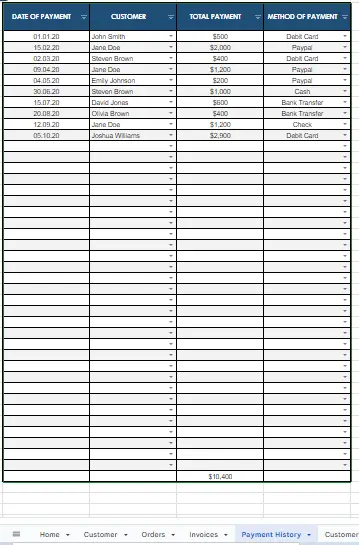
- DATE OF PAYMENT: This column provides the information on the date when the payment was made.
- CUSTOMER: Contains the name and surname information of the customer. The data comes from the 'CUSTOMER NAME' field in the Customer table.
- TOTAL PAYMENT: Records the total amount of payment made. METHOD OF
- PAYMENT: Indicates the payment method used. The data comes from the 'PAYMENT METHODS' field in the Data table.
The bottommost value represents the aggregate sum of the TOTAL PAYMENT column. The scorecard charts for TOTAL PAYMENT on the home page are derived from this particular value.
CUSTOMER NOTES
This page serves as a place to record any notes related to the customer. This page is used to keep track of any customer-related conversations, customer inquiries, or customer complaints.
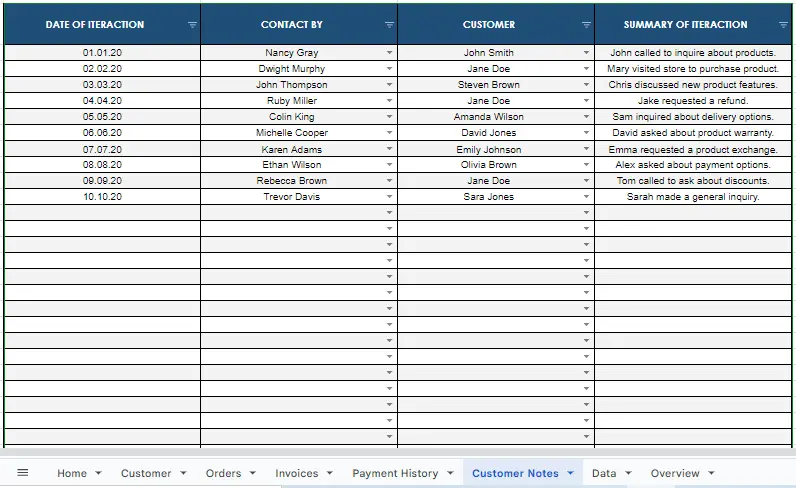
- DATE OF INTERACTION: The date when the customer interaction occurred.
- CONTACT BY: The name and surname of the sales representative. It comes from the data in the SALES REPRESENT field in the table.
- CUSTOMER: The column where the customer's name and surname information is located. It comes from the data in the PAYMENT METHODS field in the CUSTOMER NAME table.
- SUMMARY OF INTERACTION: A brief summary of the topic discussed during the customer interaction.
DATA PAGE
This page provides an overview of any data related to the customer. This page can include the customer’s name, address, contact information, order history, invoice history, payment history, and any other relevant data.
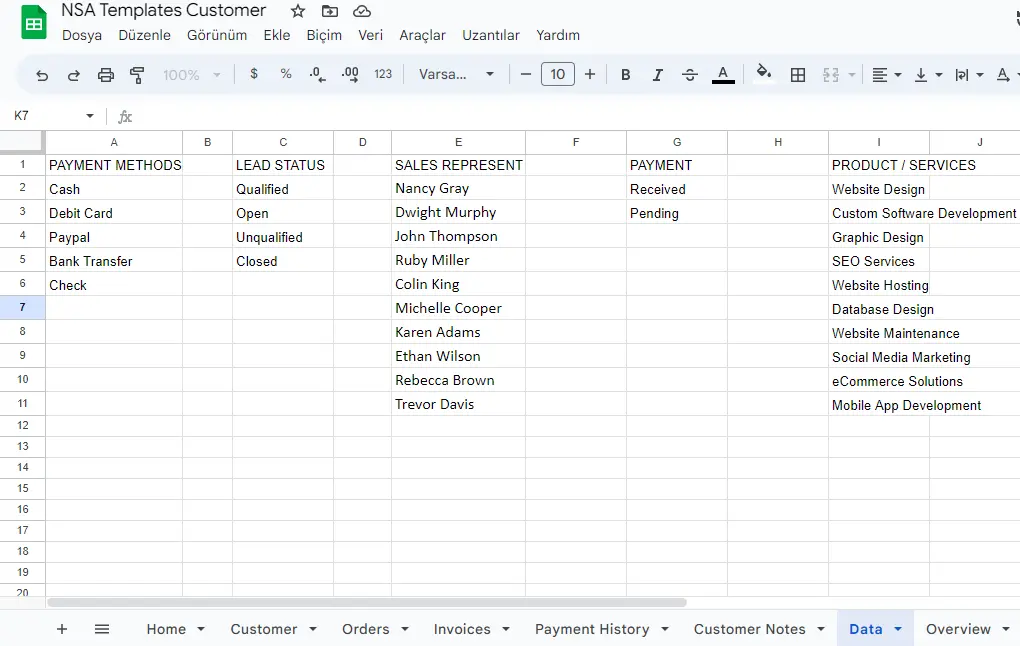
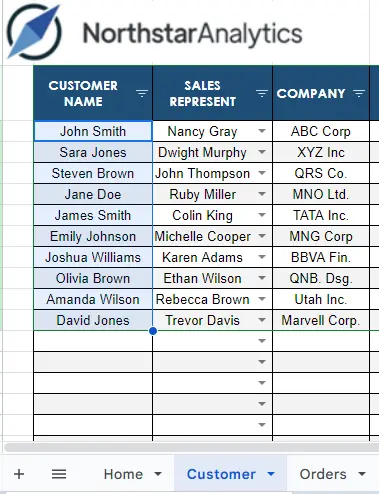
The sheets contain an excessive number of dropdown cells, which offer the same data as related cells without the need for rewriting, thus saving you time. The data in the dropdown lists can be easily deleted, added, or edited directly from the DATA sheets in each file.
How to create dropdown cells?
Let's assume that you want to add your customer data to the customer table and make it selectable in the customer name column.
Create the CUSTOMER NAME header and paste your customer name data.
Note: If the data includes formatting, you can select "paste values only " from the paste options.
Navigate to the table you want to connect your data to and select the cells you want to connect.
Choose data validation from the data tab.
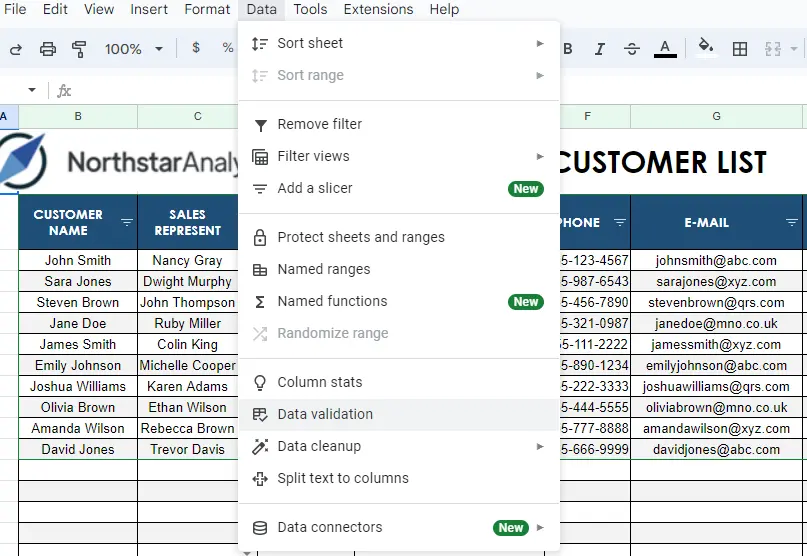
Select "add a rule" from the window that pops up.
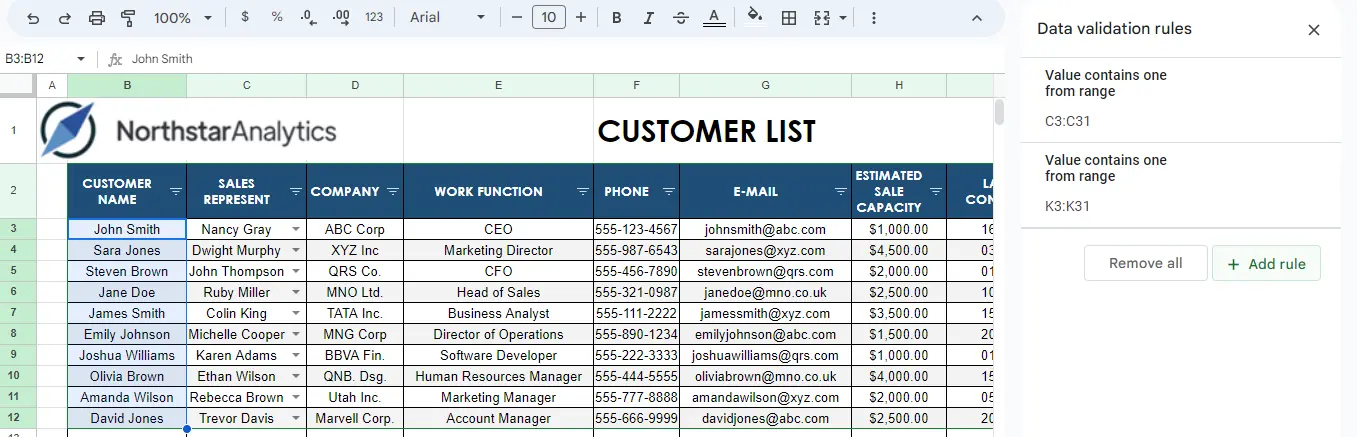
The applied field automatically appears as the field we selected. Under "criteria", select "from a range" from the dropdown menu. Hover over the box and click "Select data range".
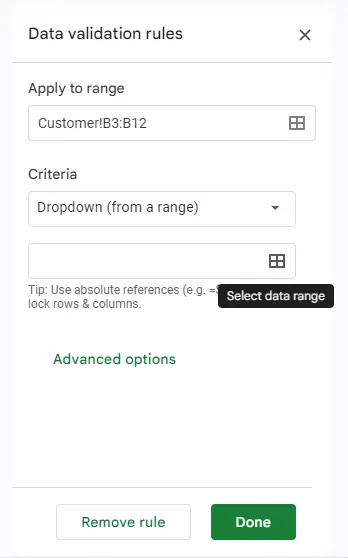
Go to the data page and select your source data.

The window that pops up will be automatically filled based on the cells you selected. Then click OK.
Advanced options allow you to make adjustments. I chose to display it as an arrow in the Display Style because I wanted it to look like the others.
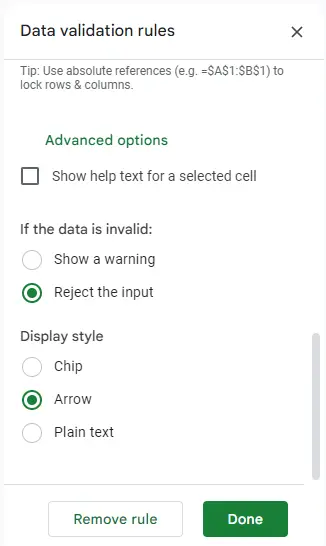
After making the necessary adjustments, click Done. It's ready now.