How to copy (duplicate) a Google Data Studio Dashboard?

Copying a Google Data Studio dashboard isn't hard. But, it should be completed in one shot to avoid re-copying everything again.
Copy-paste operations might save you time and effort, however, with Google Data Studio, copying is much easier than that. You don't have to go through the hassle of copying items from one Data Studio to another.
Check out how easy it is to copy multiple charts in Google Data. This article will walk you through step by step and make your duplication process easier. Let's have a look at the steps together.
Find your template
This is the most straightforward step. Please open the template you bought and see the next step.
Make a copy
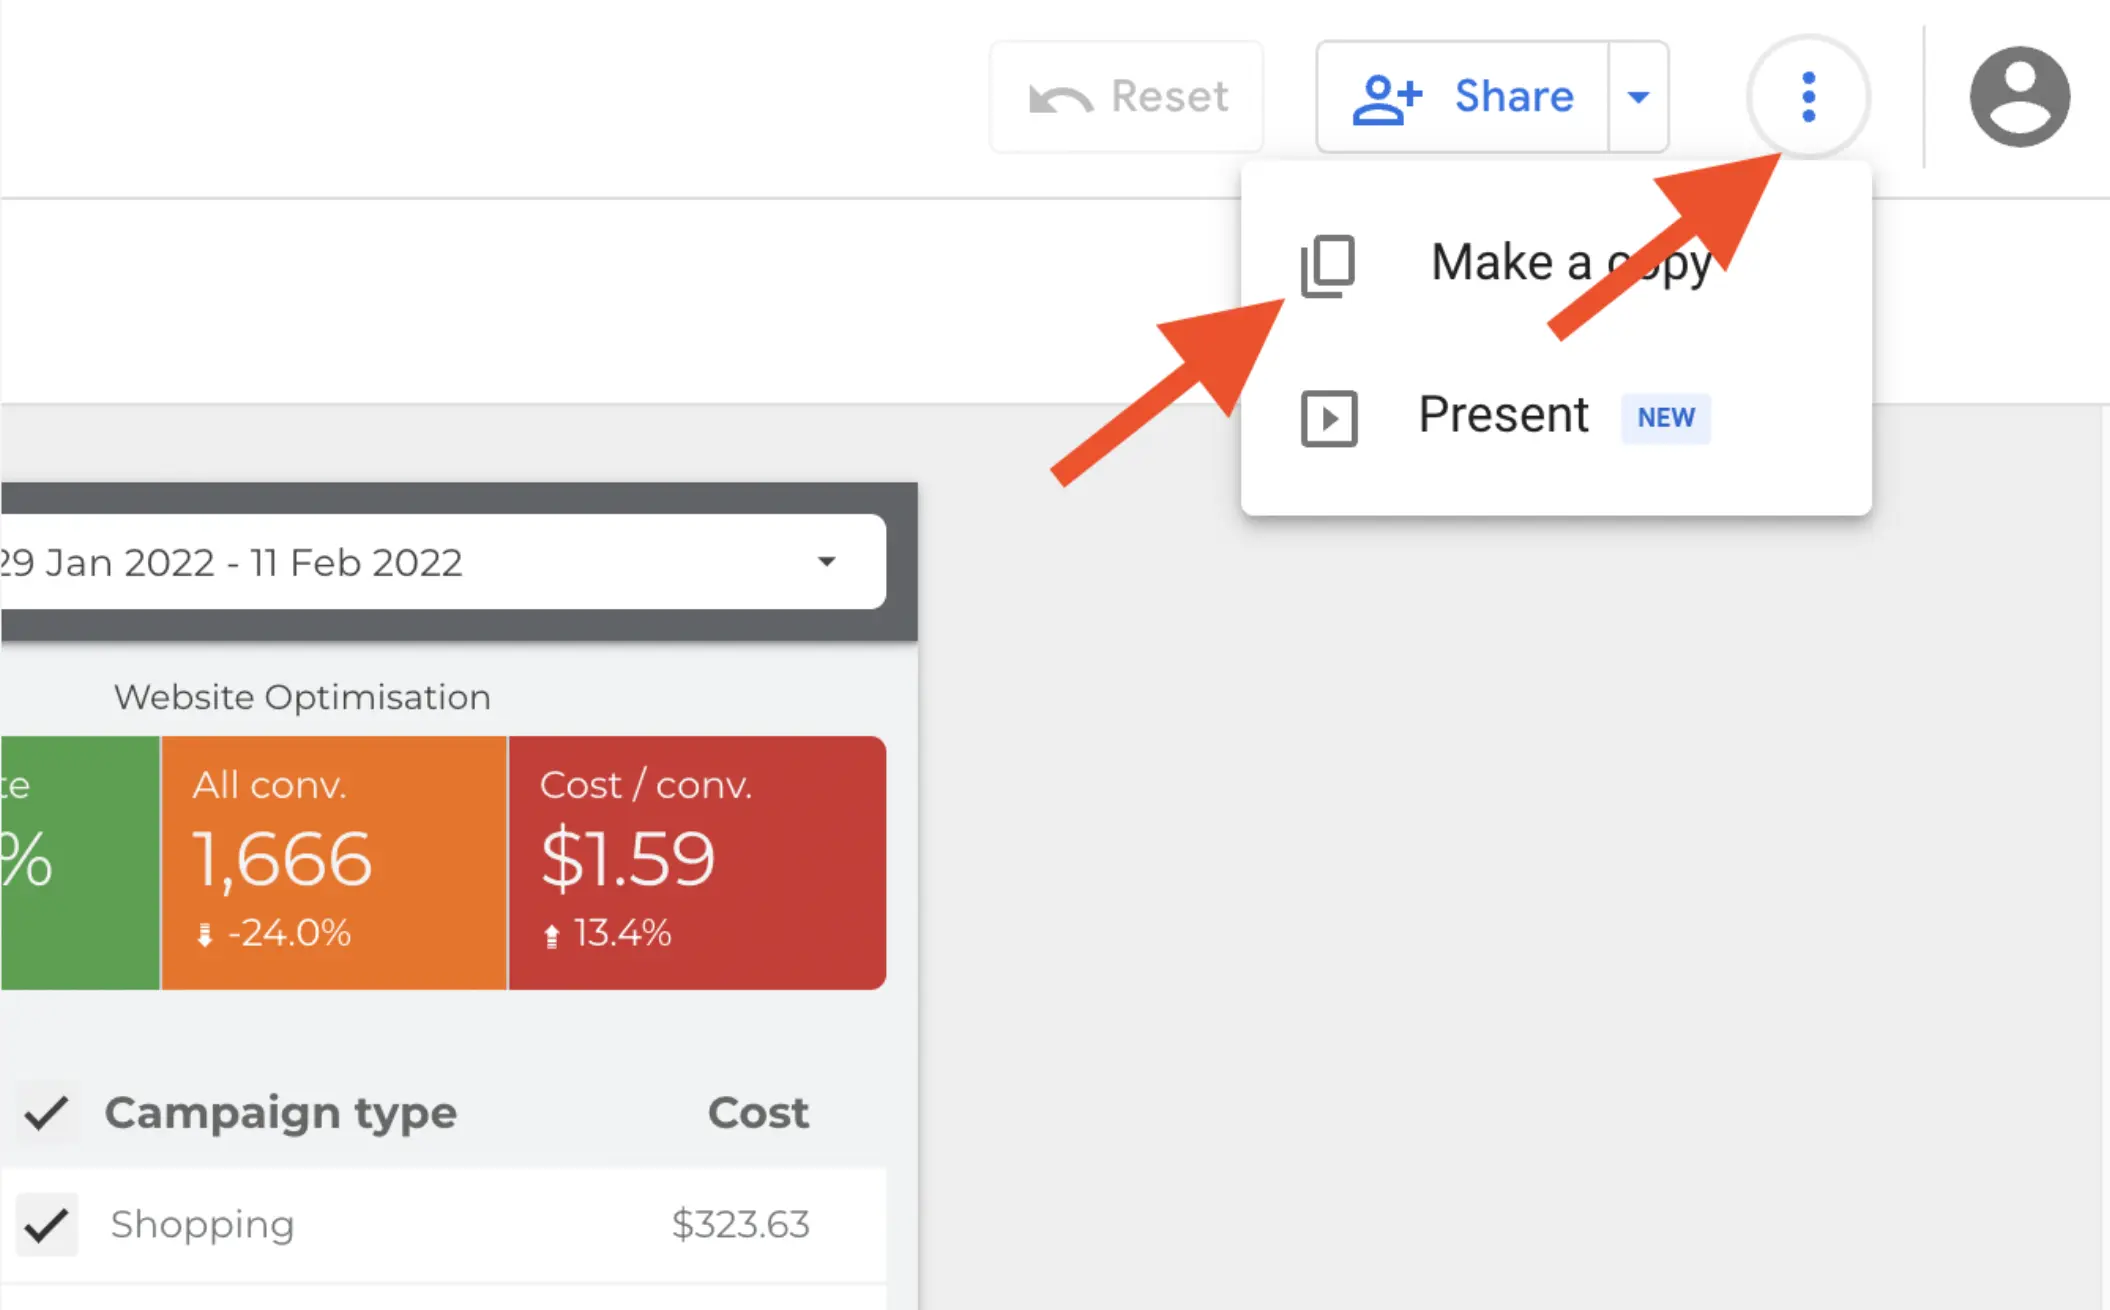
Navigate to the top right area and click on the 3 dots and then, “Make a copy”.
Please be aware of the followings:
- If nothing happens, please be sure that you are logged in to your Google account and try again. If you don’t log in to your Google account in the same browser, you won’t copy the dashboard.
- Be sure that this Gmail account also has access to the Google Ads account you are trying to analyse.
Setup GDS Account
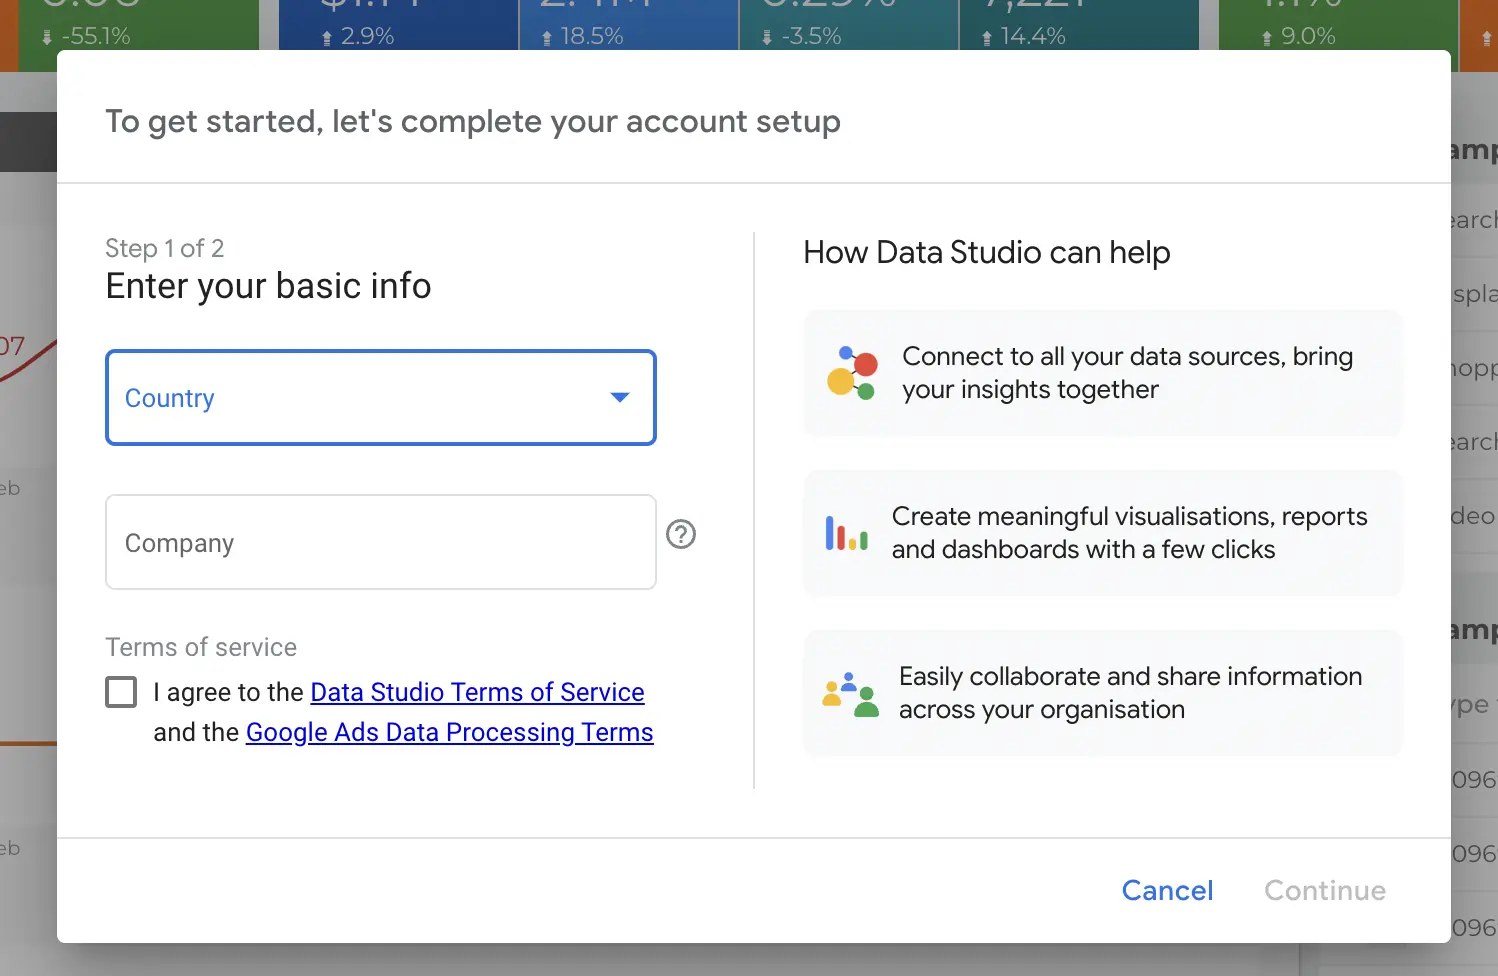
You'll see the below screenshot if you are using the Google Data Studio account for the first time. Please fill in the country and Company information and proceed to the next step. About creating Google Data Studio account, here is also a more detailed guide.
Then, you'll see the email preferences. If you are curious about Google Data Studio and would like to receive information, you can select a relevant emailing option to Yes.

Create Data Source
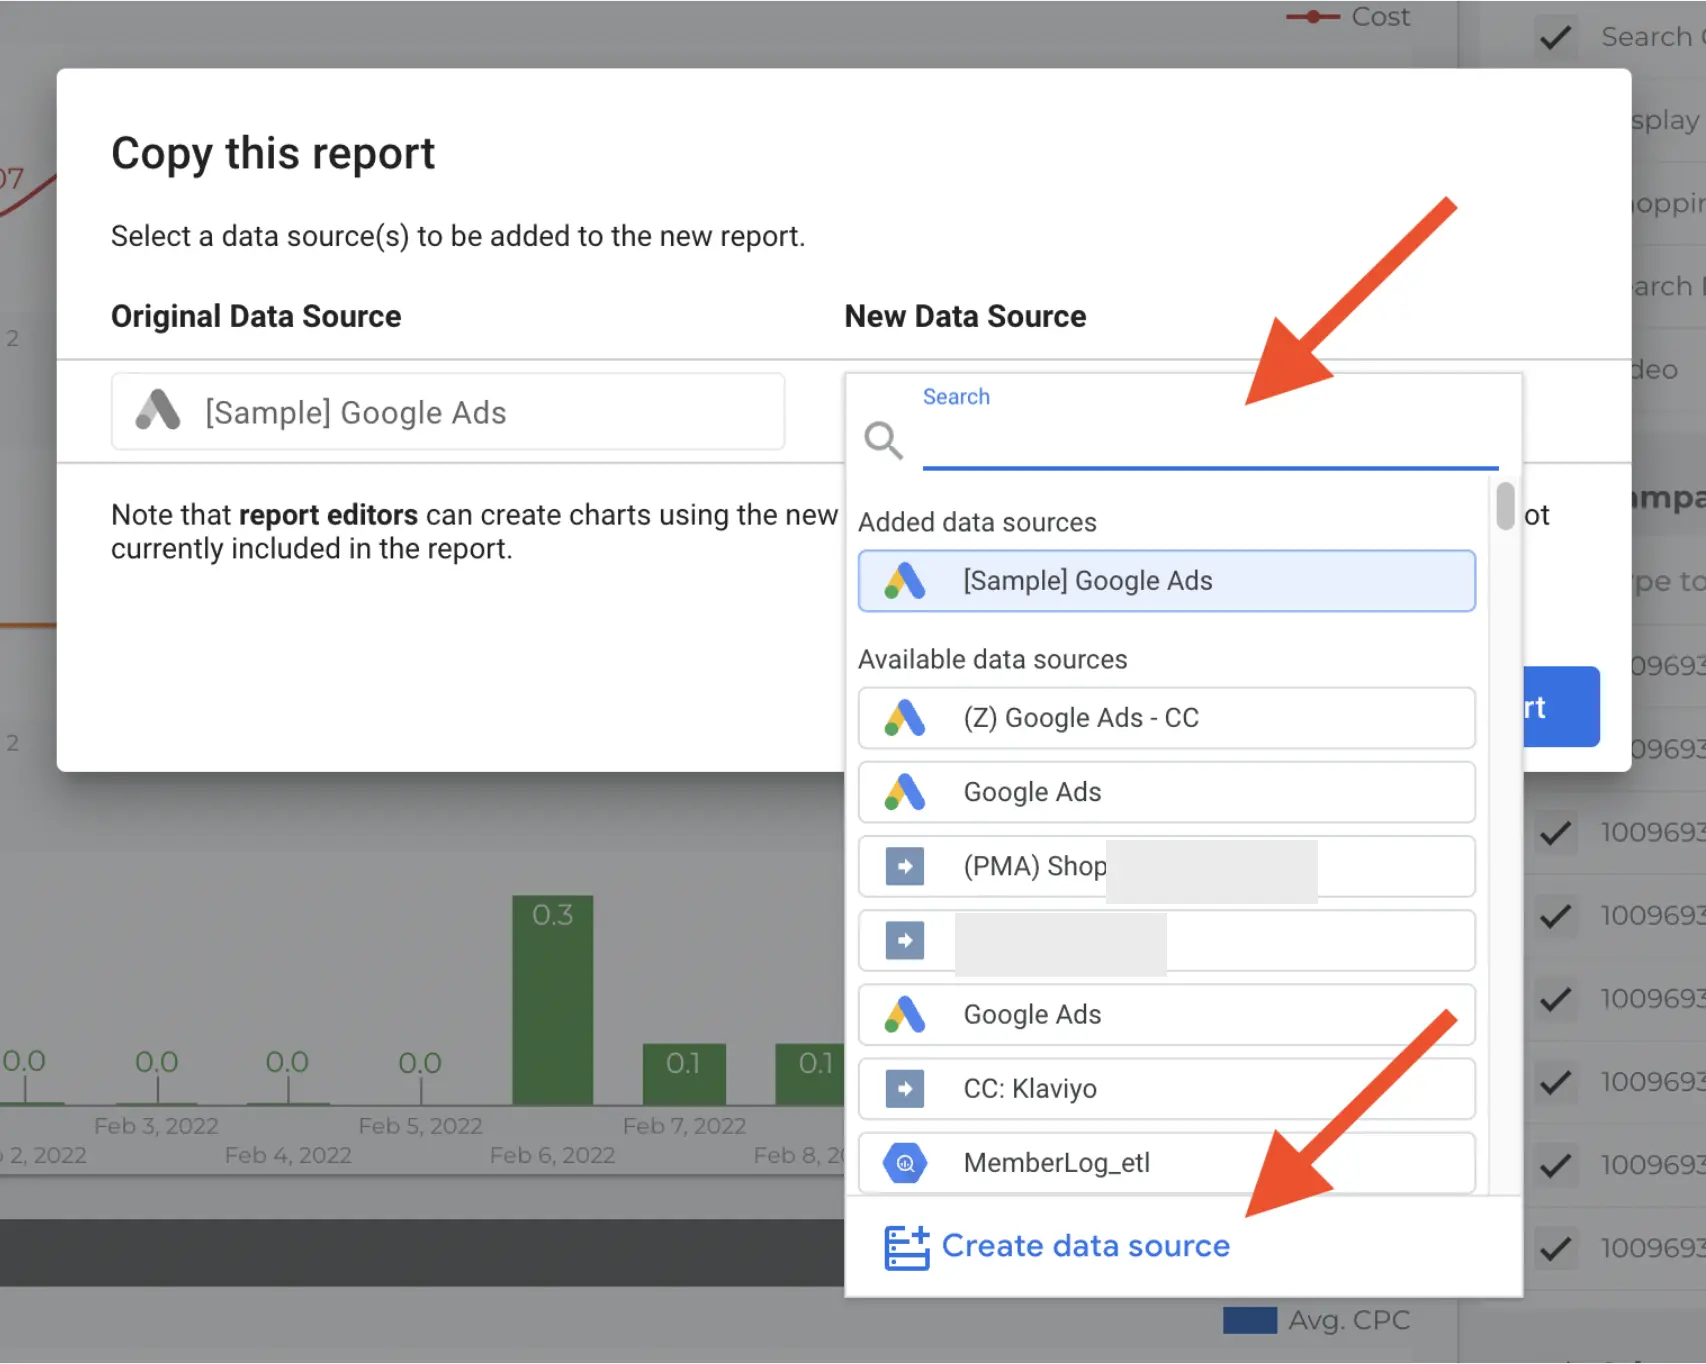
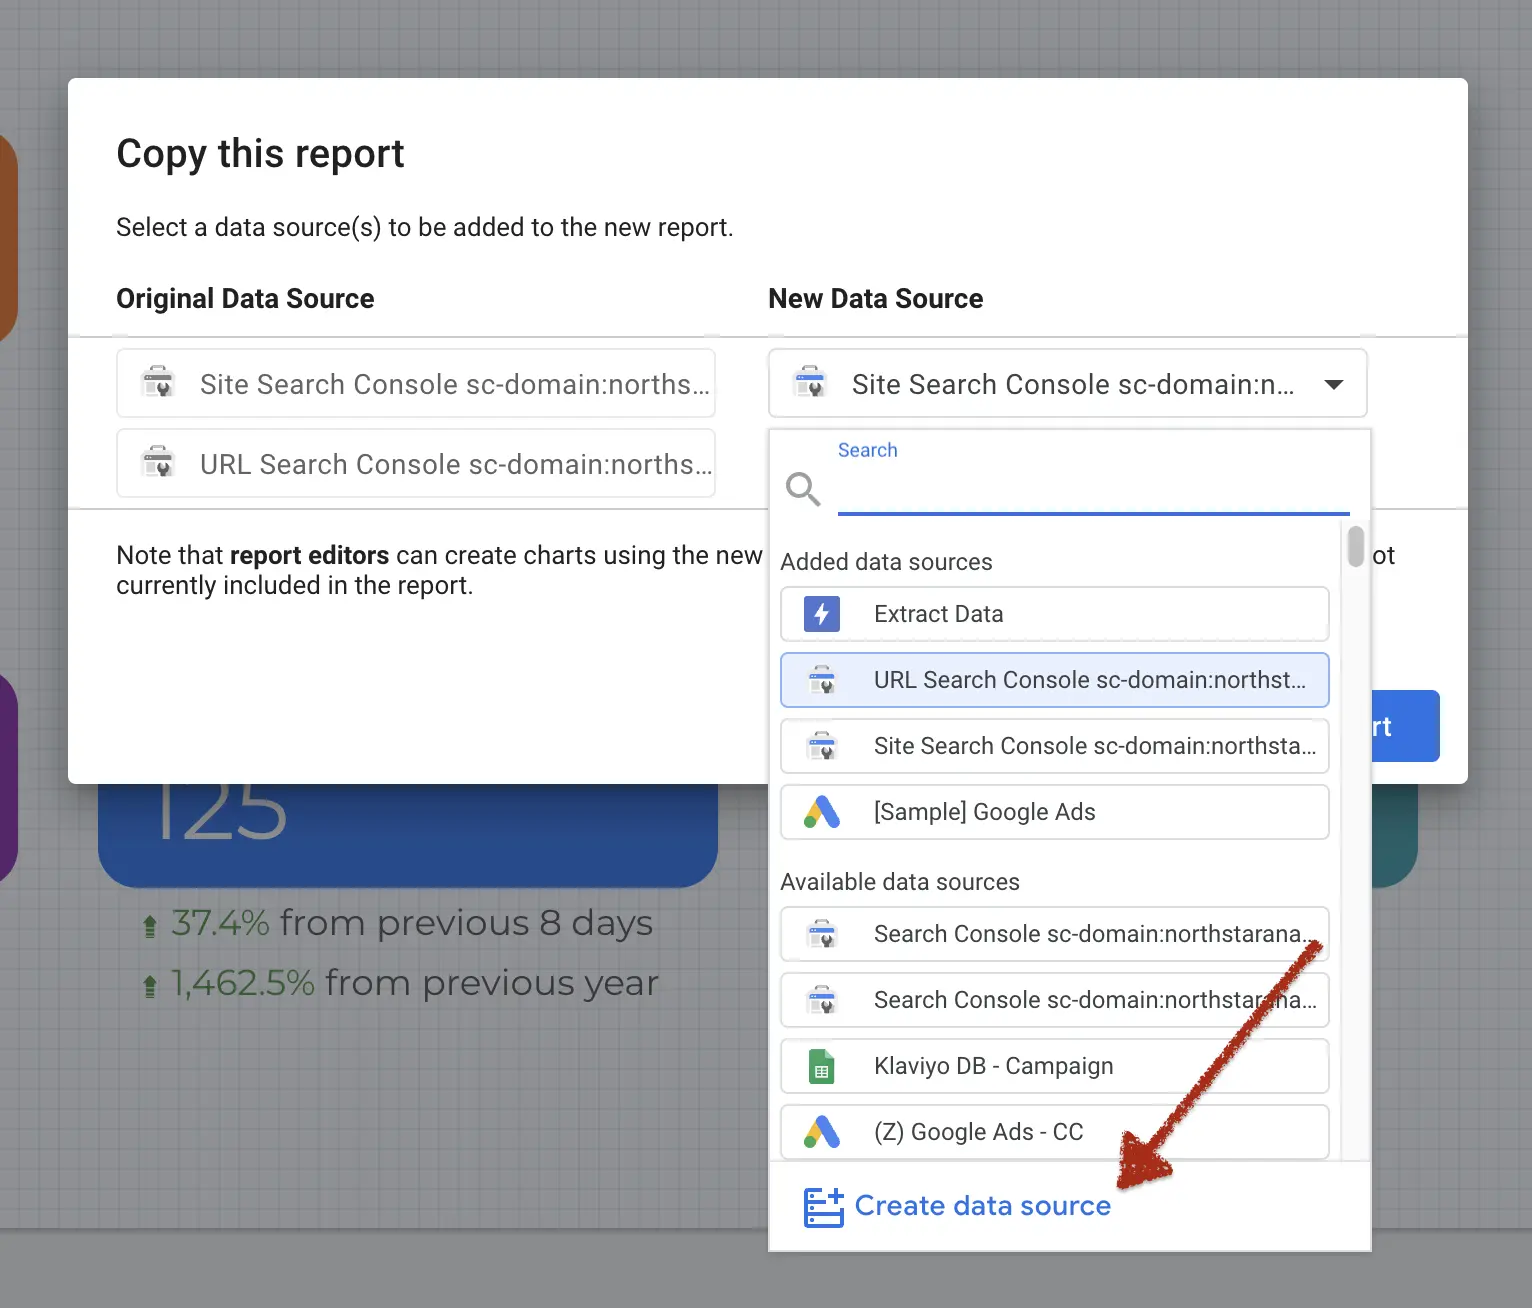
After you click “Make a copy” then, you’ll see a popup that let you select the new data source. You should create a new data source by selecting “Create data source”. About connecting for existing data sources, you can check this article too.
Source-Specific Actions
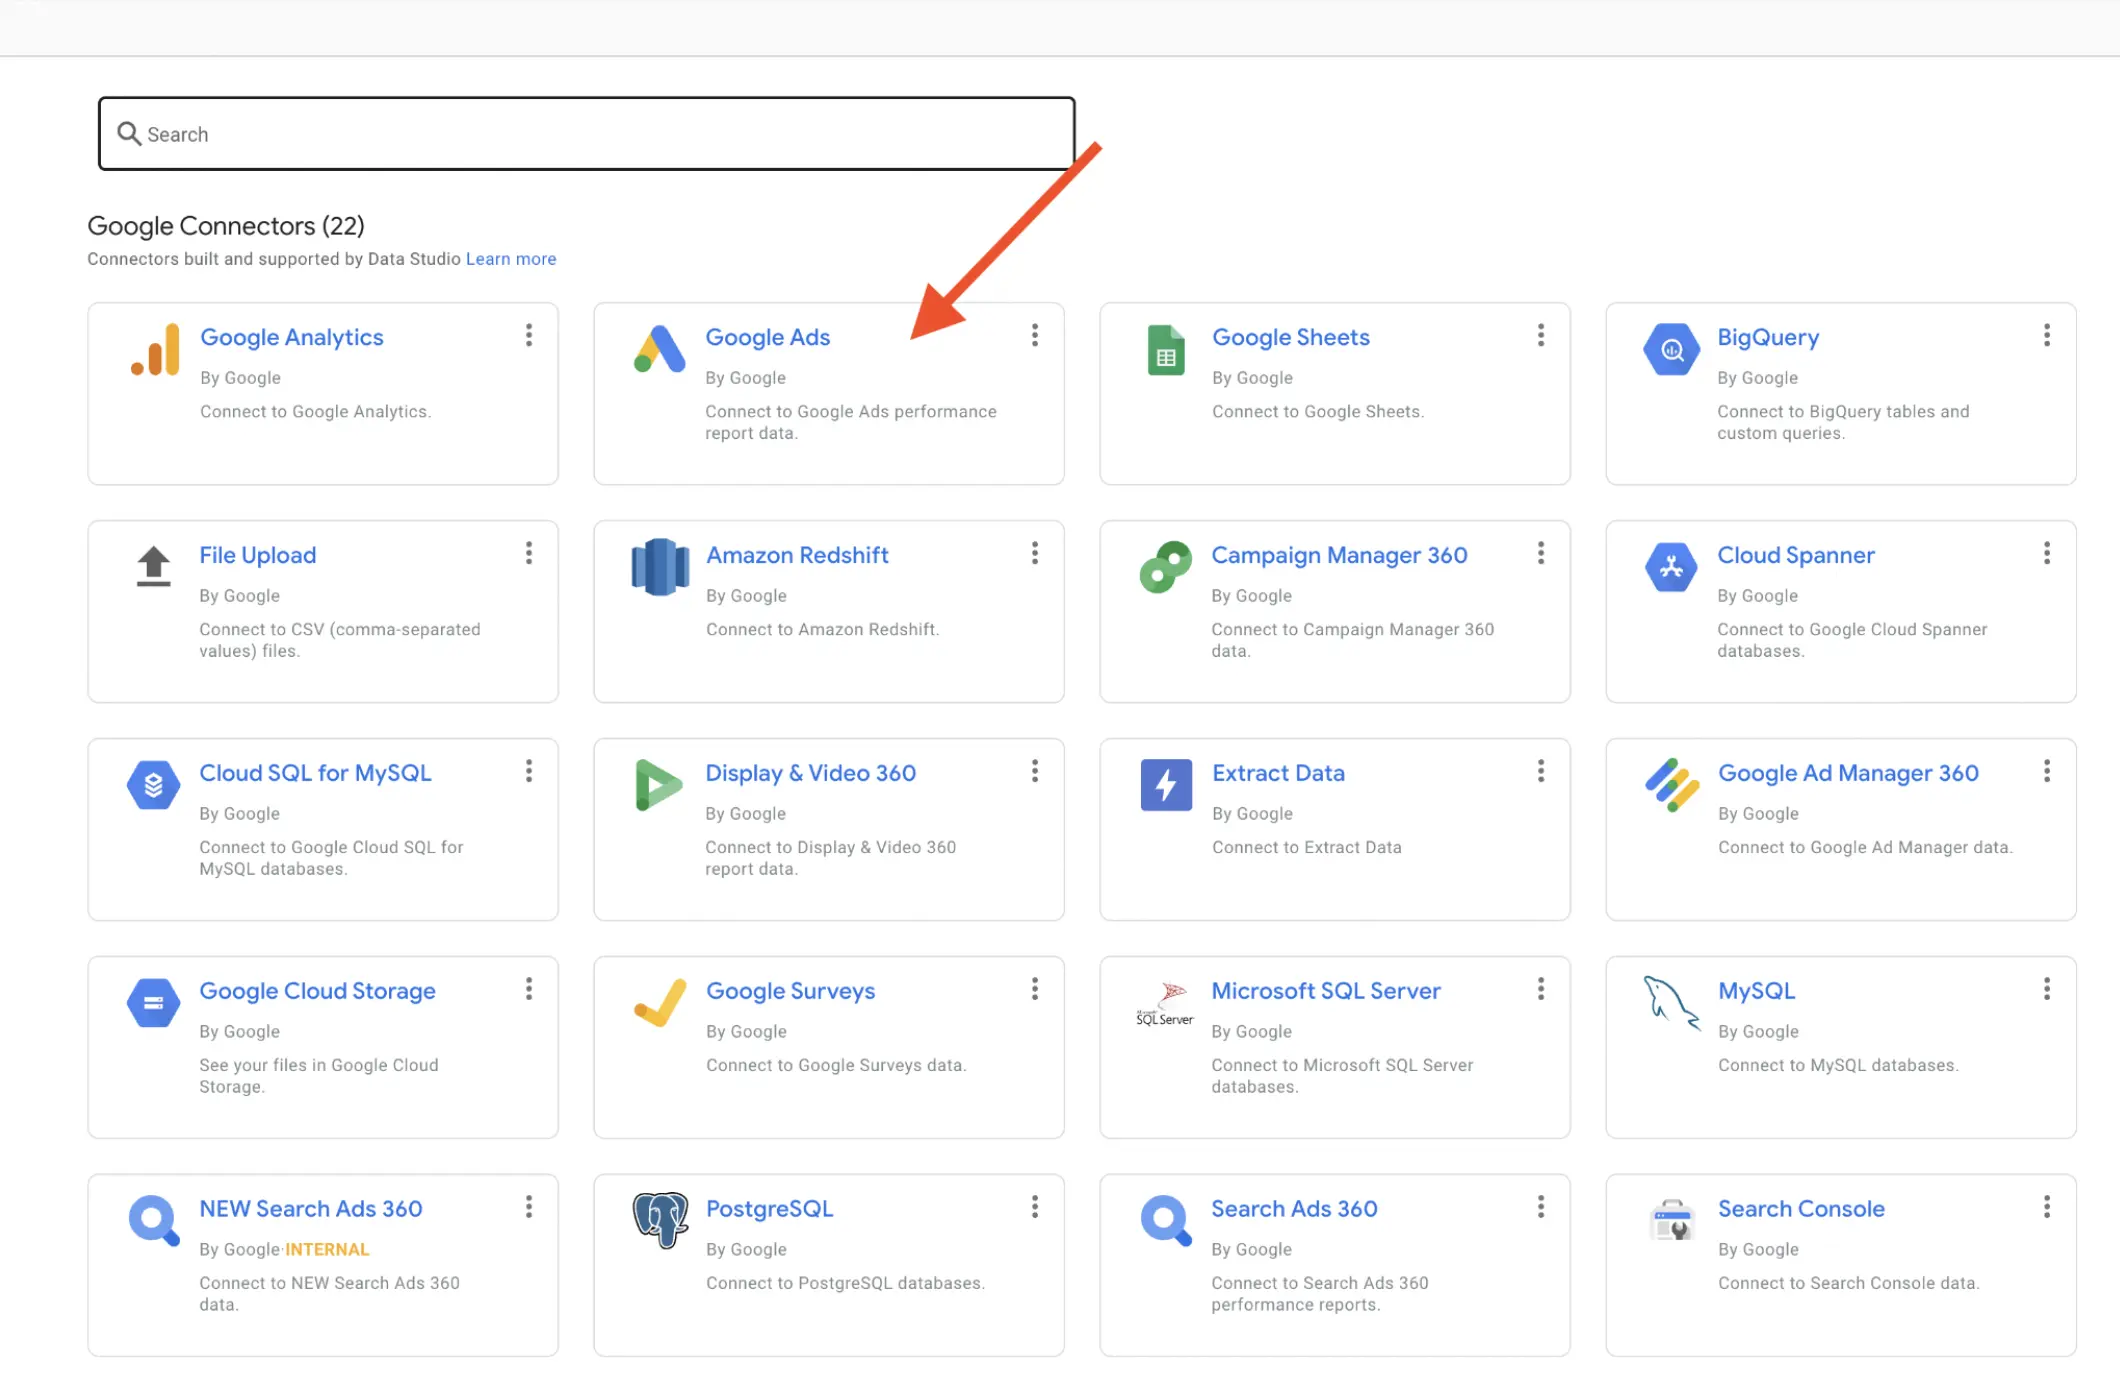
In this part of the tutorial, we'll use Google Ads as a data source. If you are using a different source then, please navigate to the appropriate section.
Google Ads as Data Source
#1 Select the source
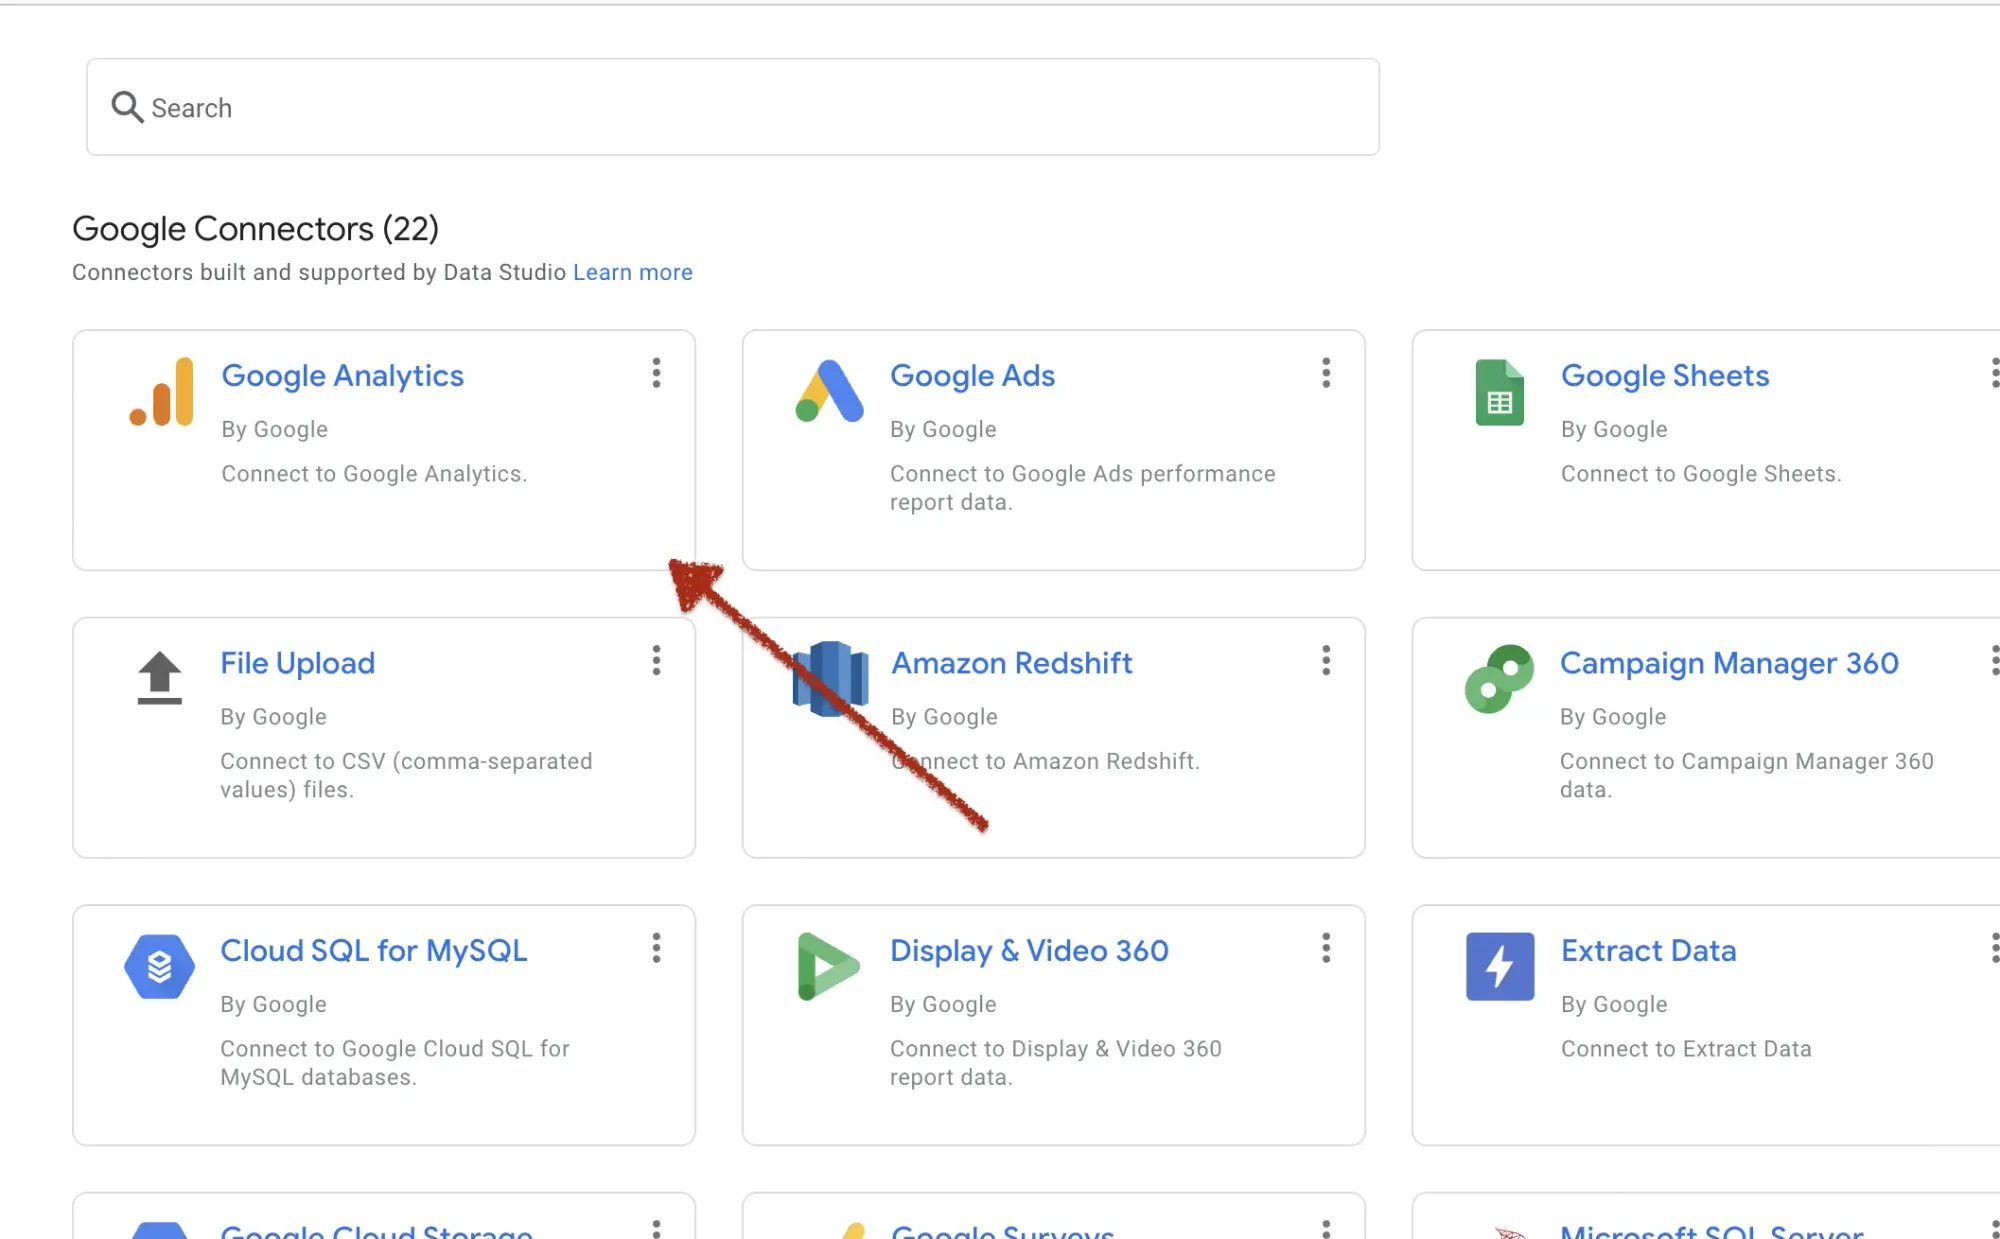
A new page will show you all available data sources. We'll use Google Ads in the part of the tutorial.
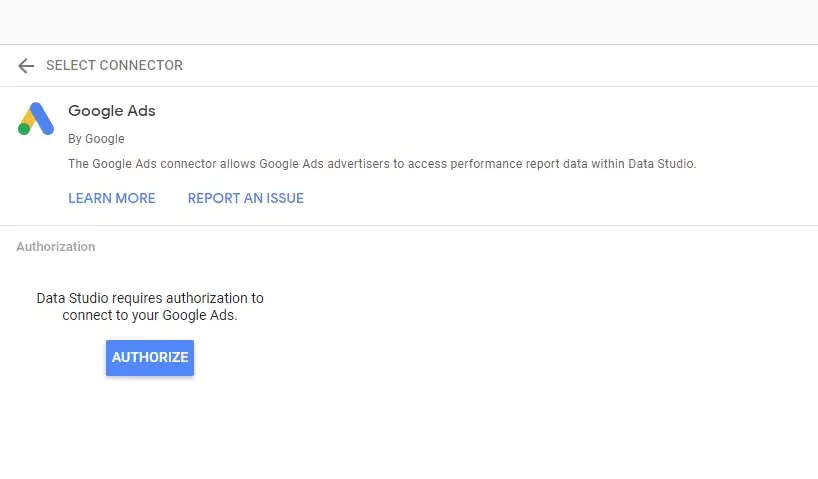
#2 Authorise
You need to authorise your Gmail account to connect your Google Ads data.
#3.1 Select the right account
If you are working with a single Google Ads account then, select your Google Ads account that is associated with the Google Ads email then click the connect button.

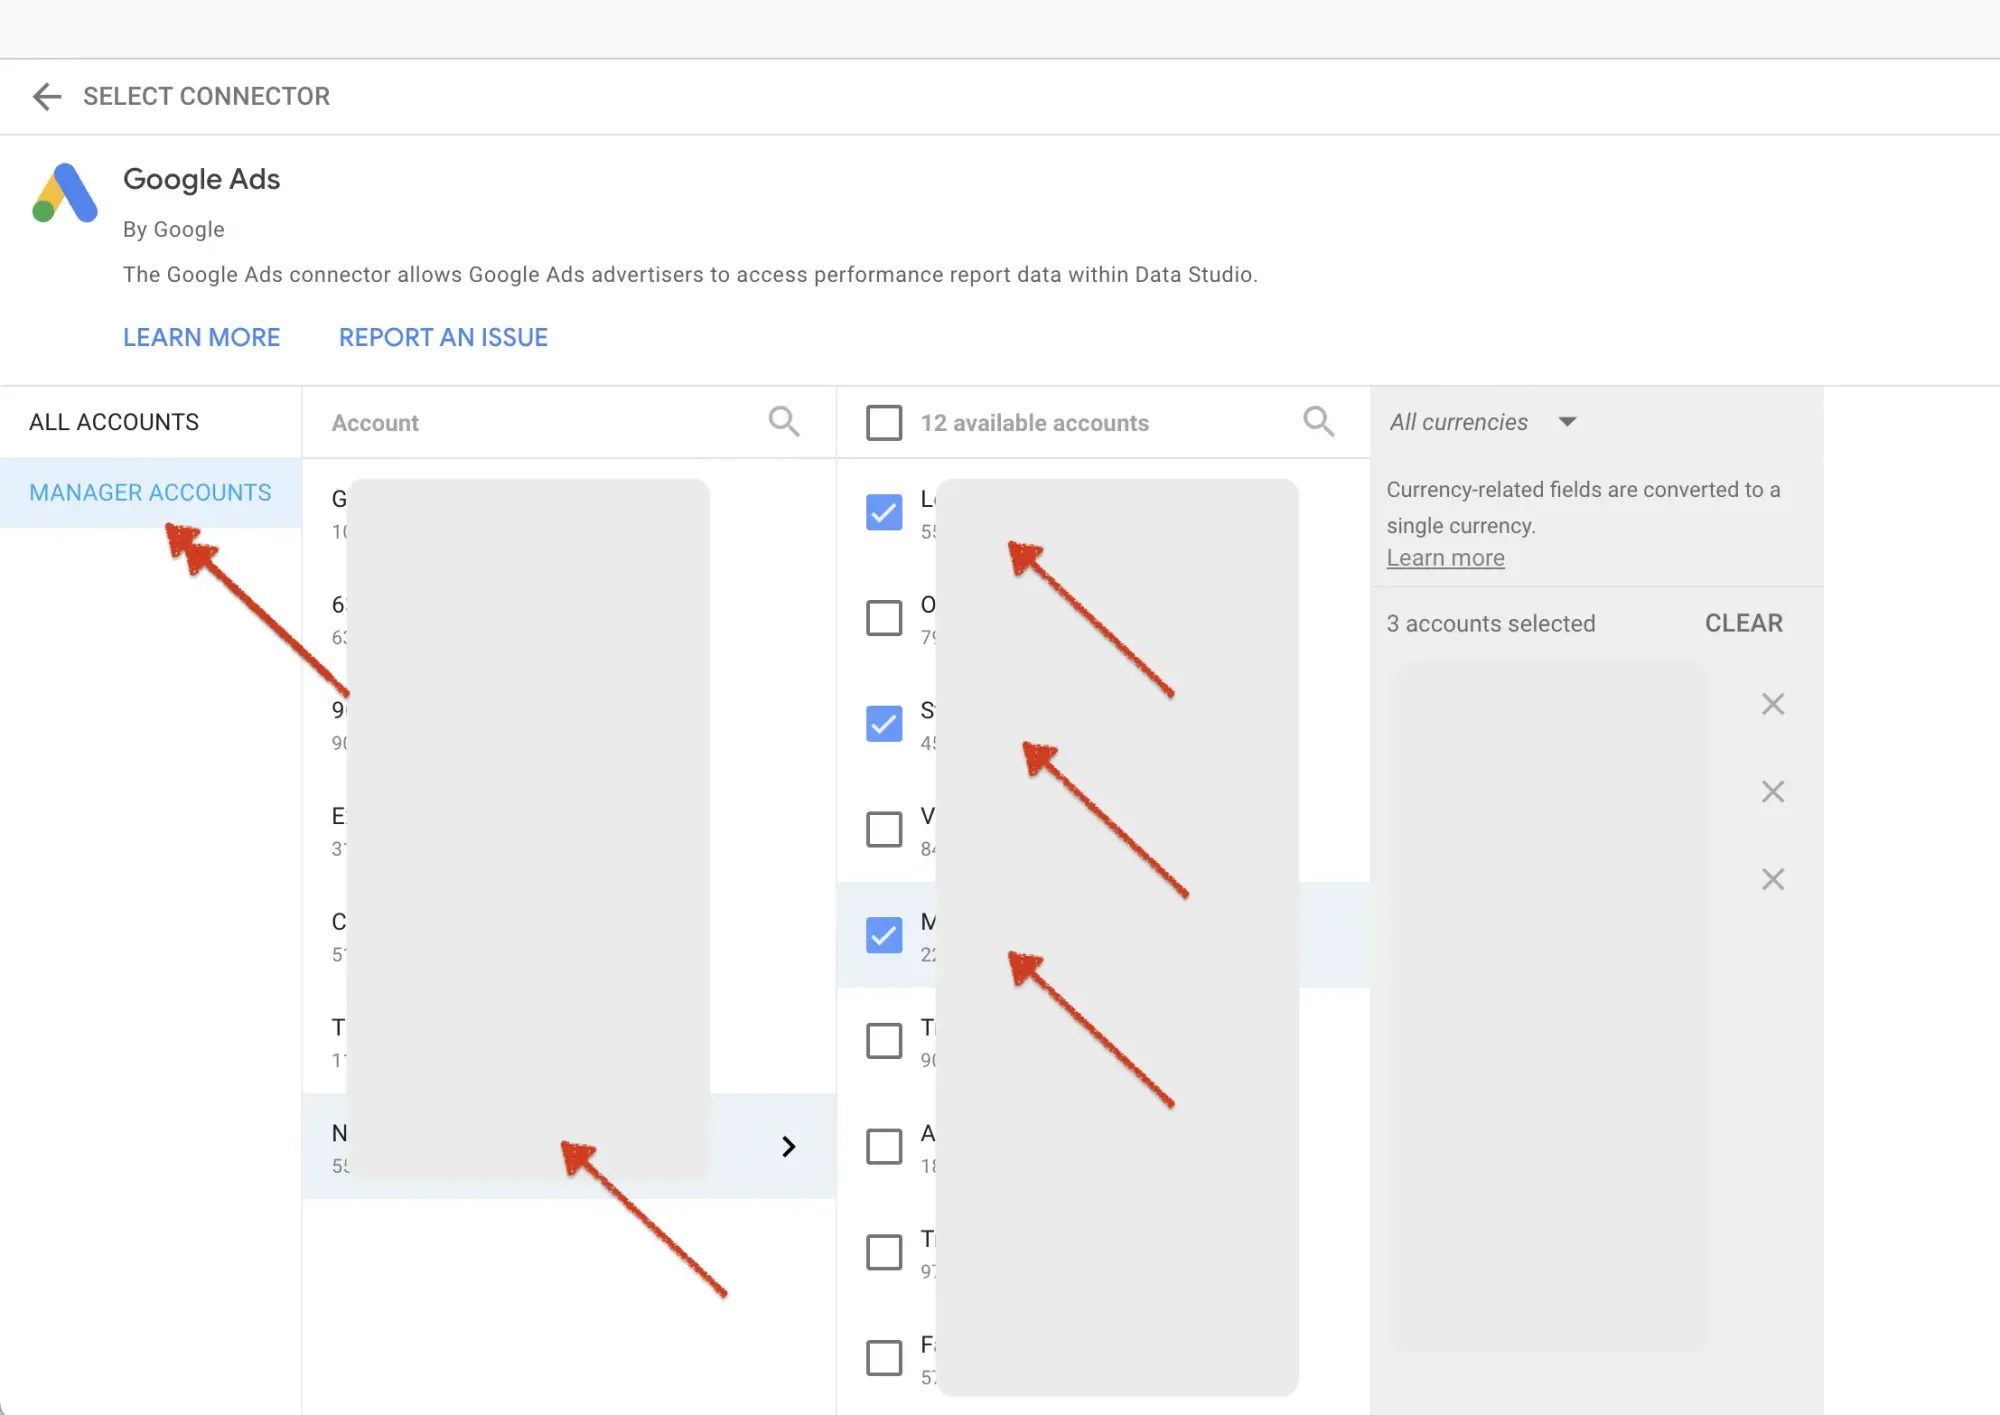
#3.2 Select the right MCC
If you have an MCC then, select "Manager Accounts" then:
- Select the MCC account
- Check every Google Ads account needed on the dashboard
- Then, click the connect button.
Google Search Console as Data Source
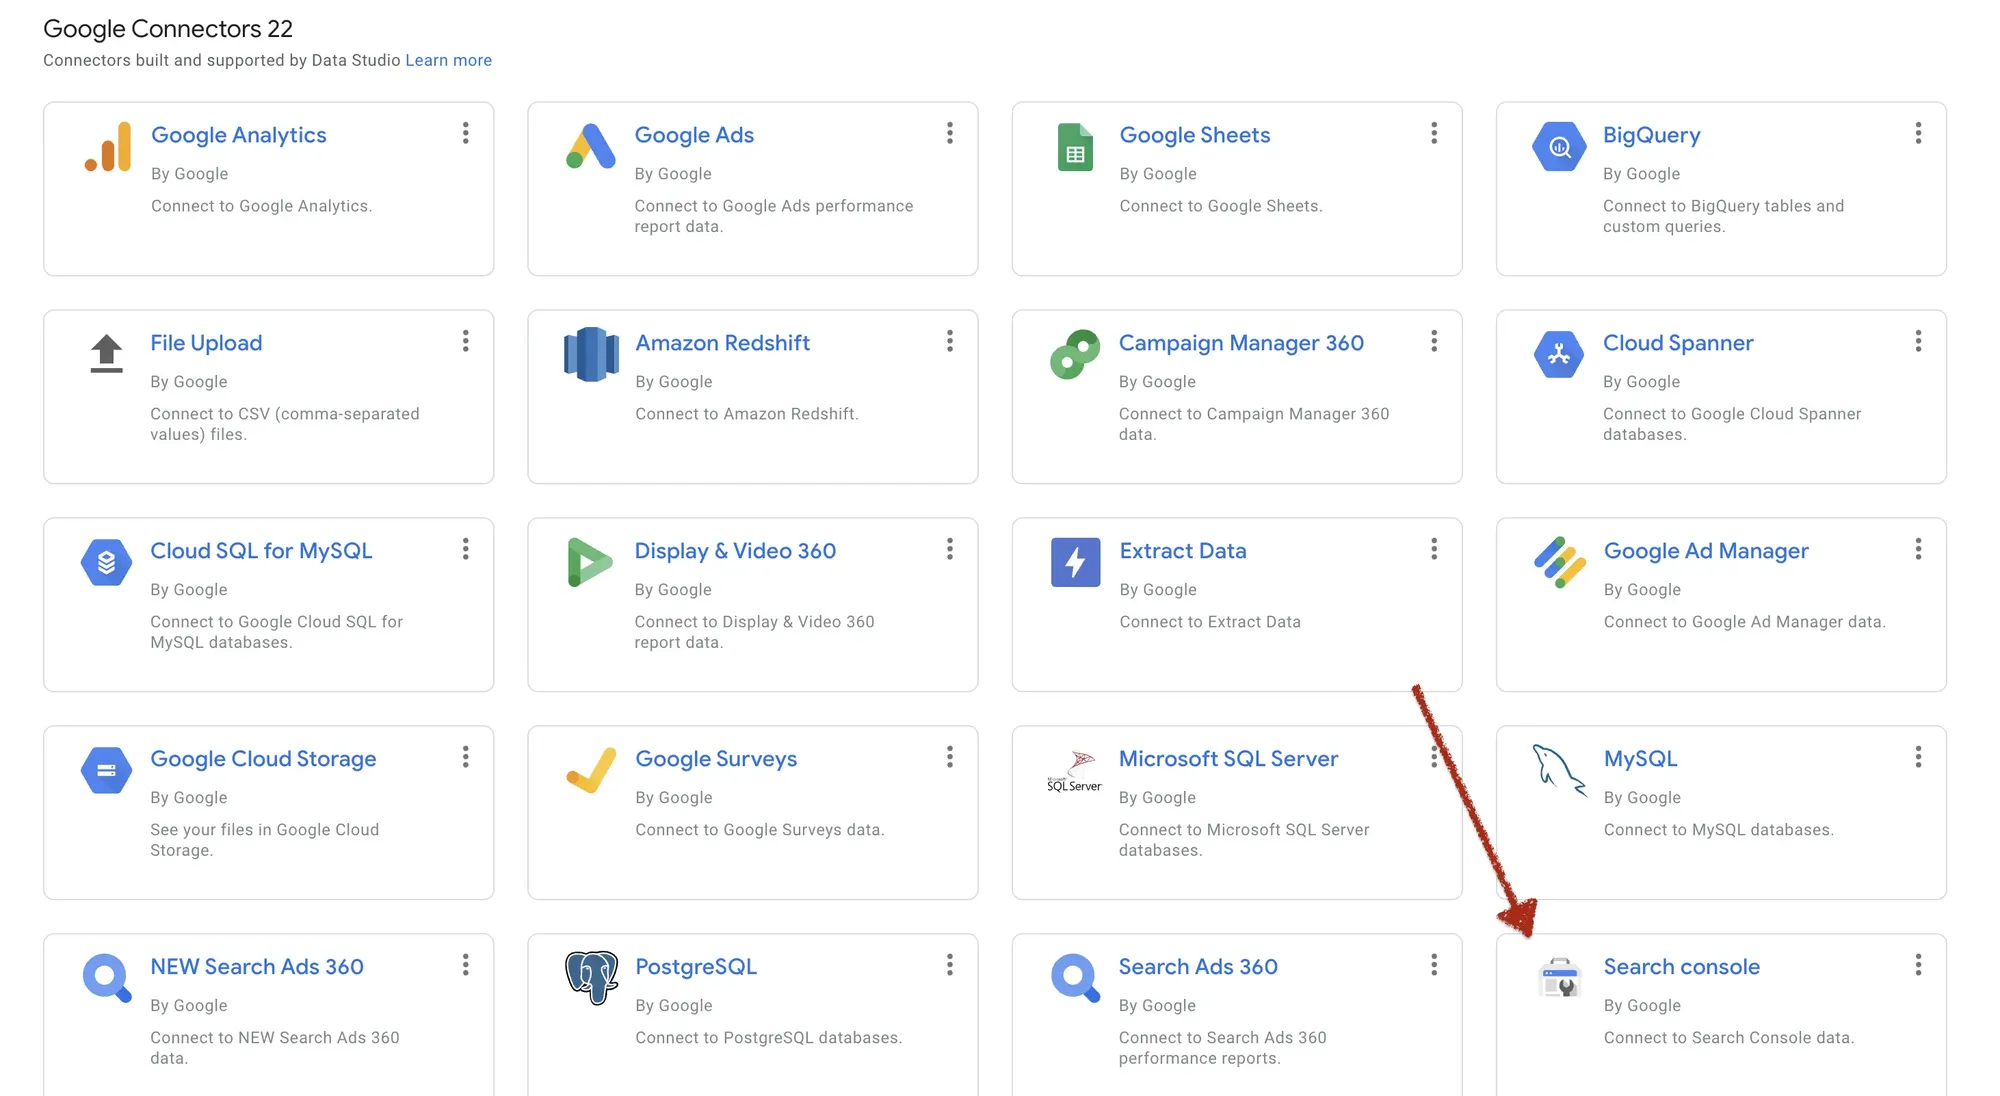
#1 Select the source
A new page will show you all available data sources. We'll use Google Search Console in the part of the tutorial.
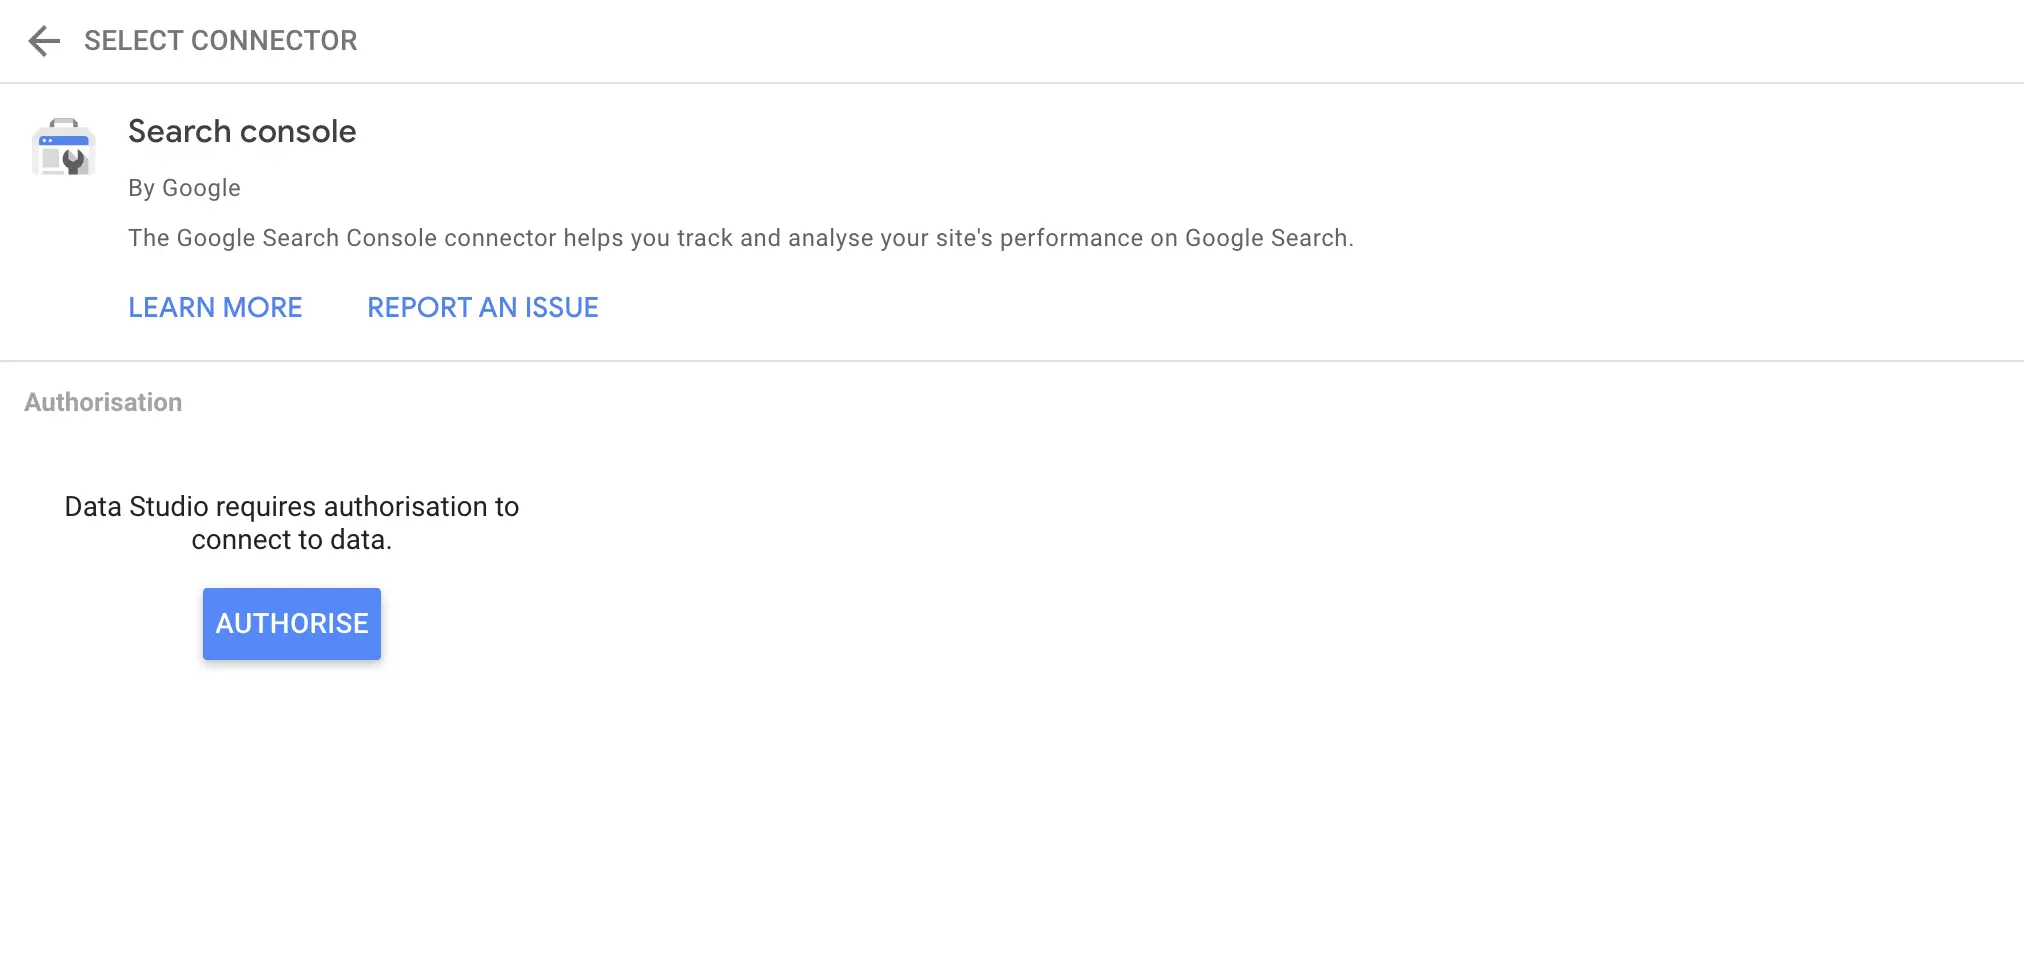
#2 Authorise
You need to authorise your Gmail account to connect your Google Search Console data.
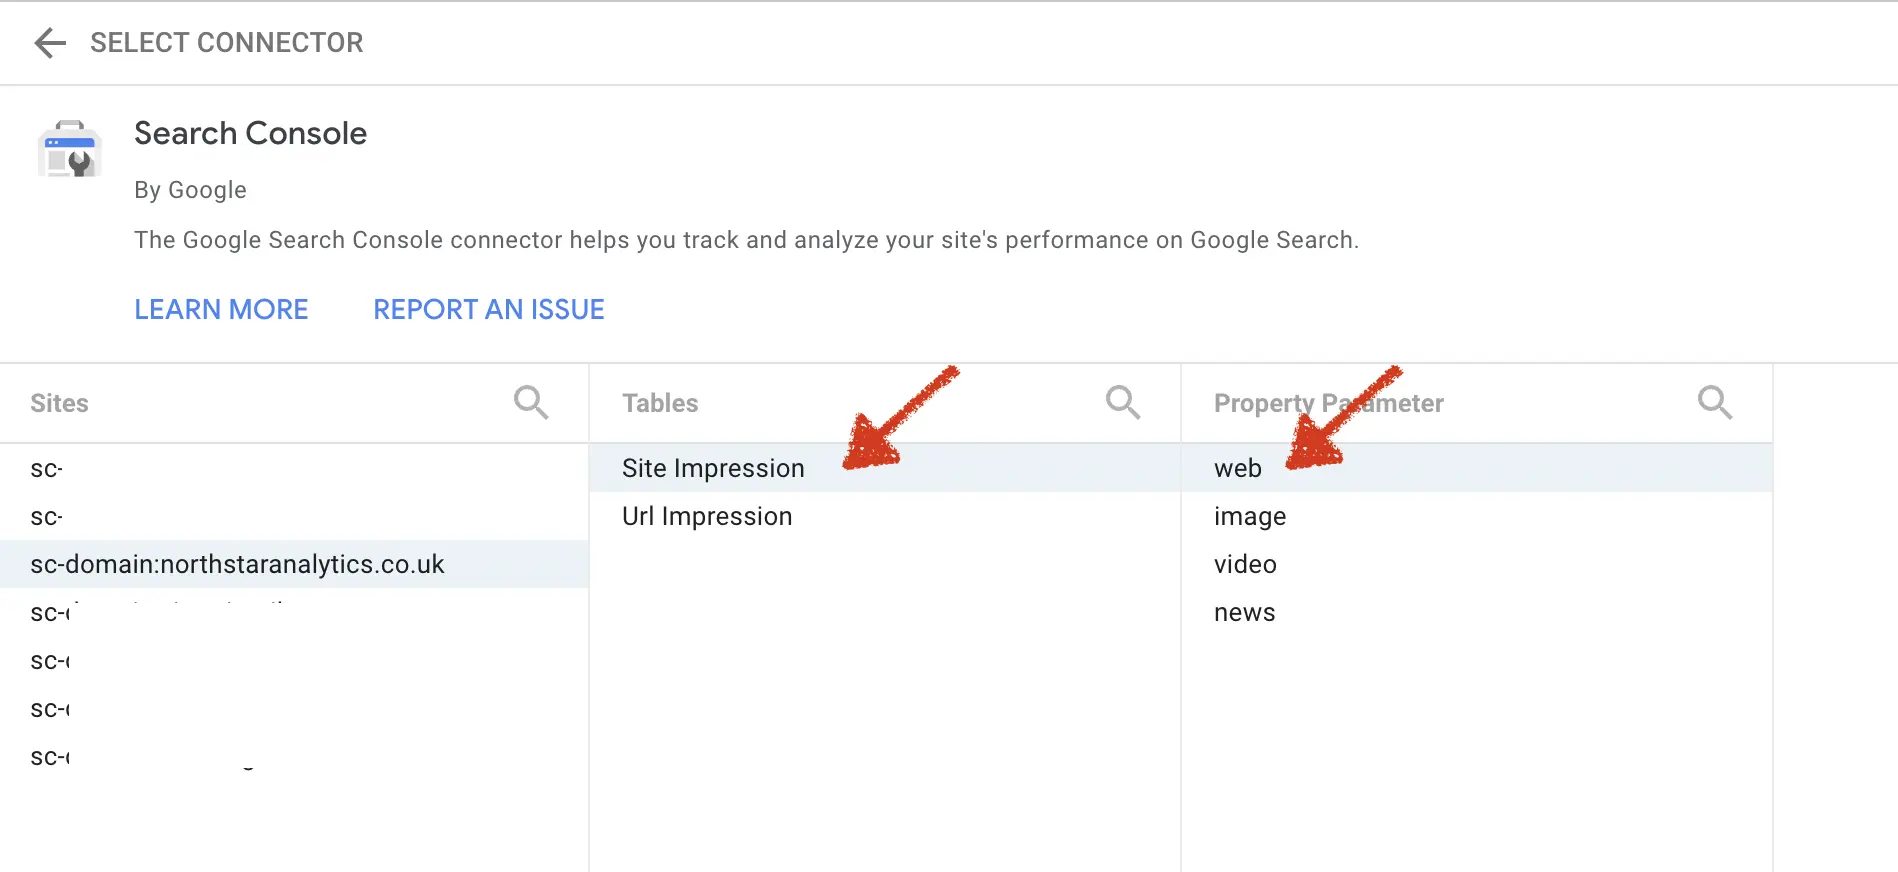
#3 Select Site and URL Impression data
We'll connect 2 data sources. URL Impression gives almost everything but, the average position of keywords. Let's start with Site Impression.
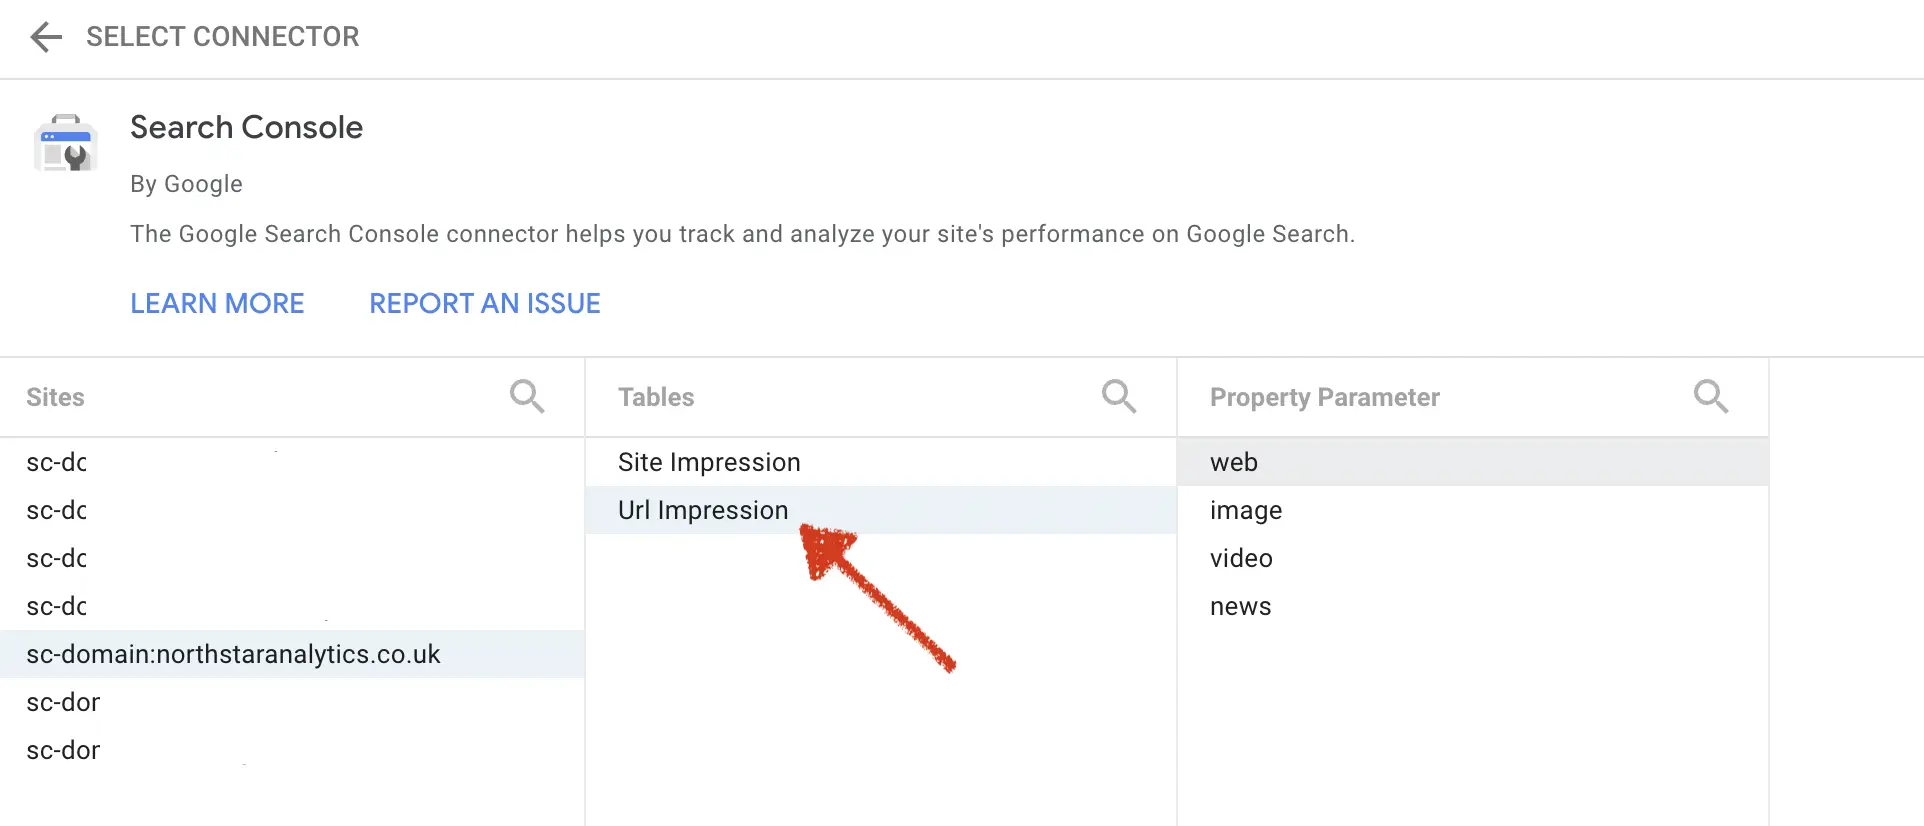
Then let's create the second data source.
You should add Url Impression at this time.
Google Analytics as Data Source
#1 Select the source
A new page will show you all available data sources. We'll use Google Search Console in the part of the tutorial.
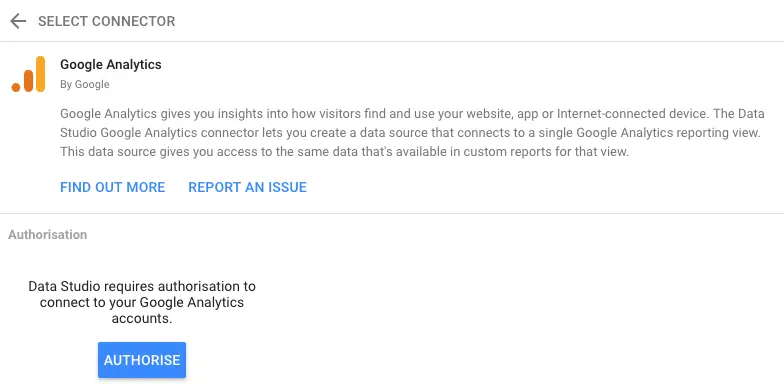
#2 Authorise
You need to authorise your Gmail account to connect your Google Search Console data.
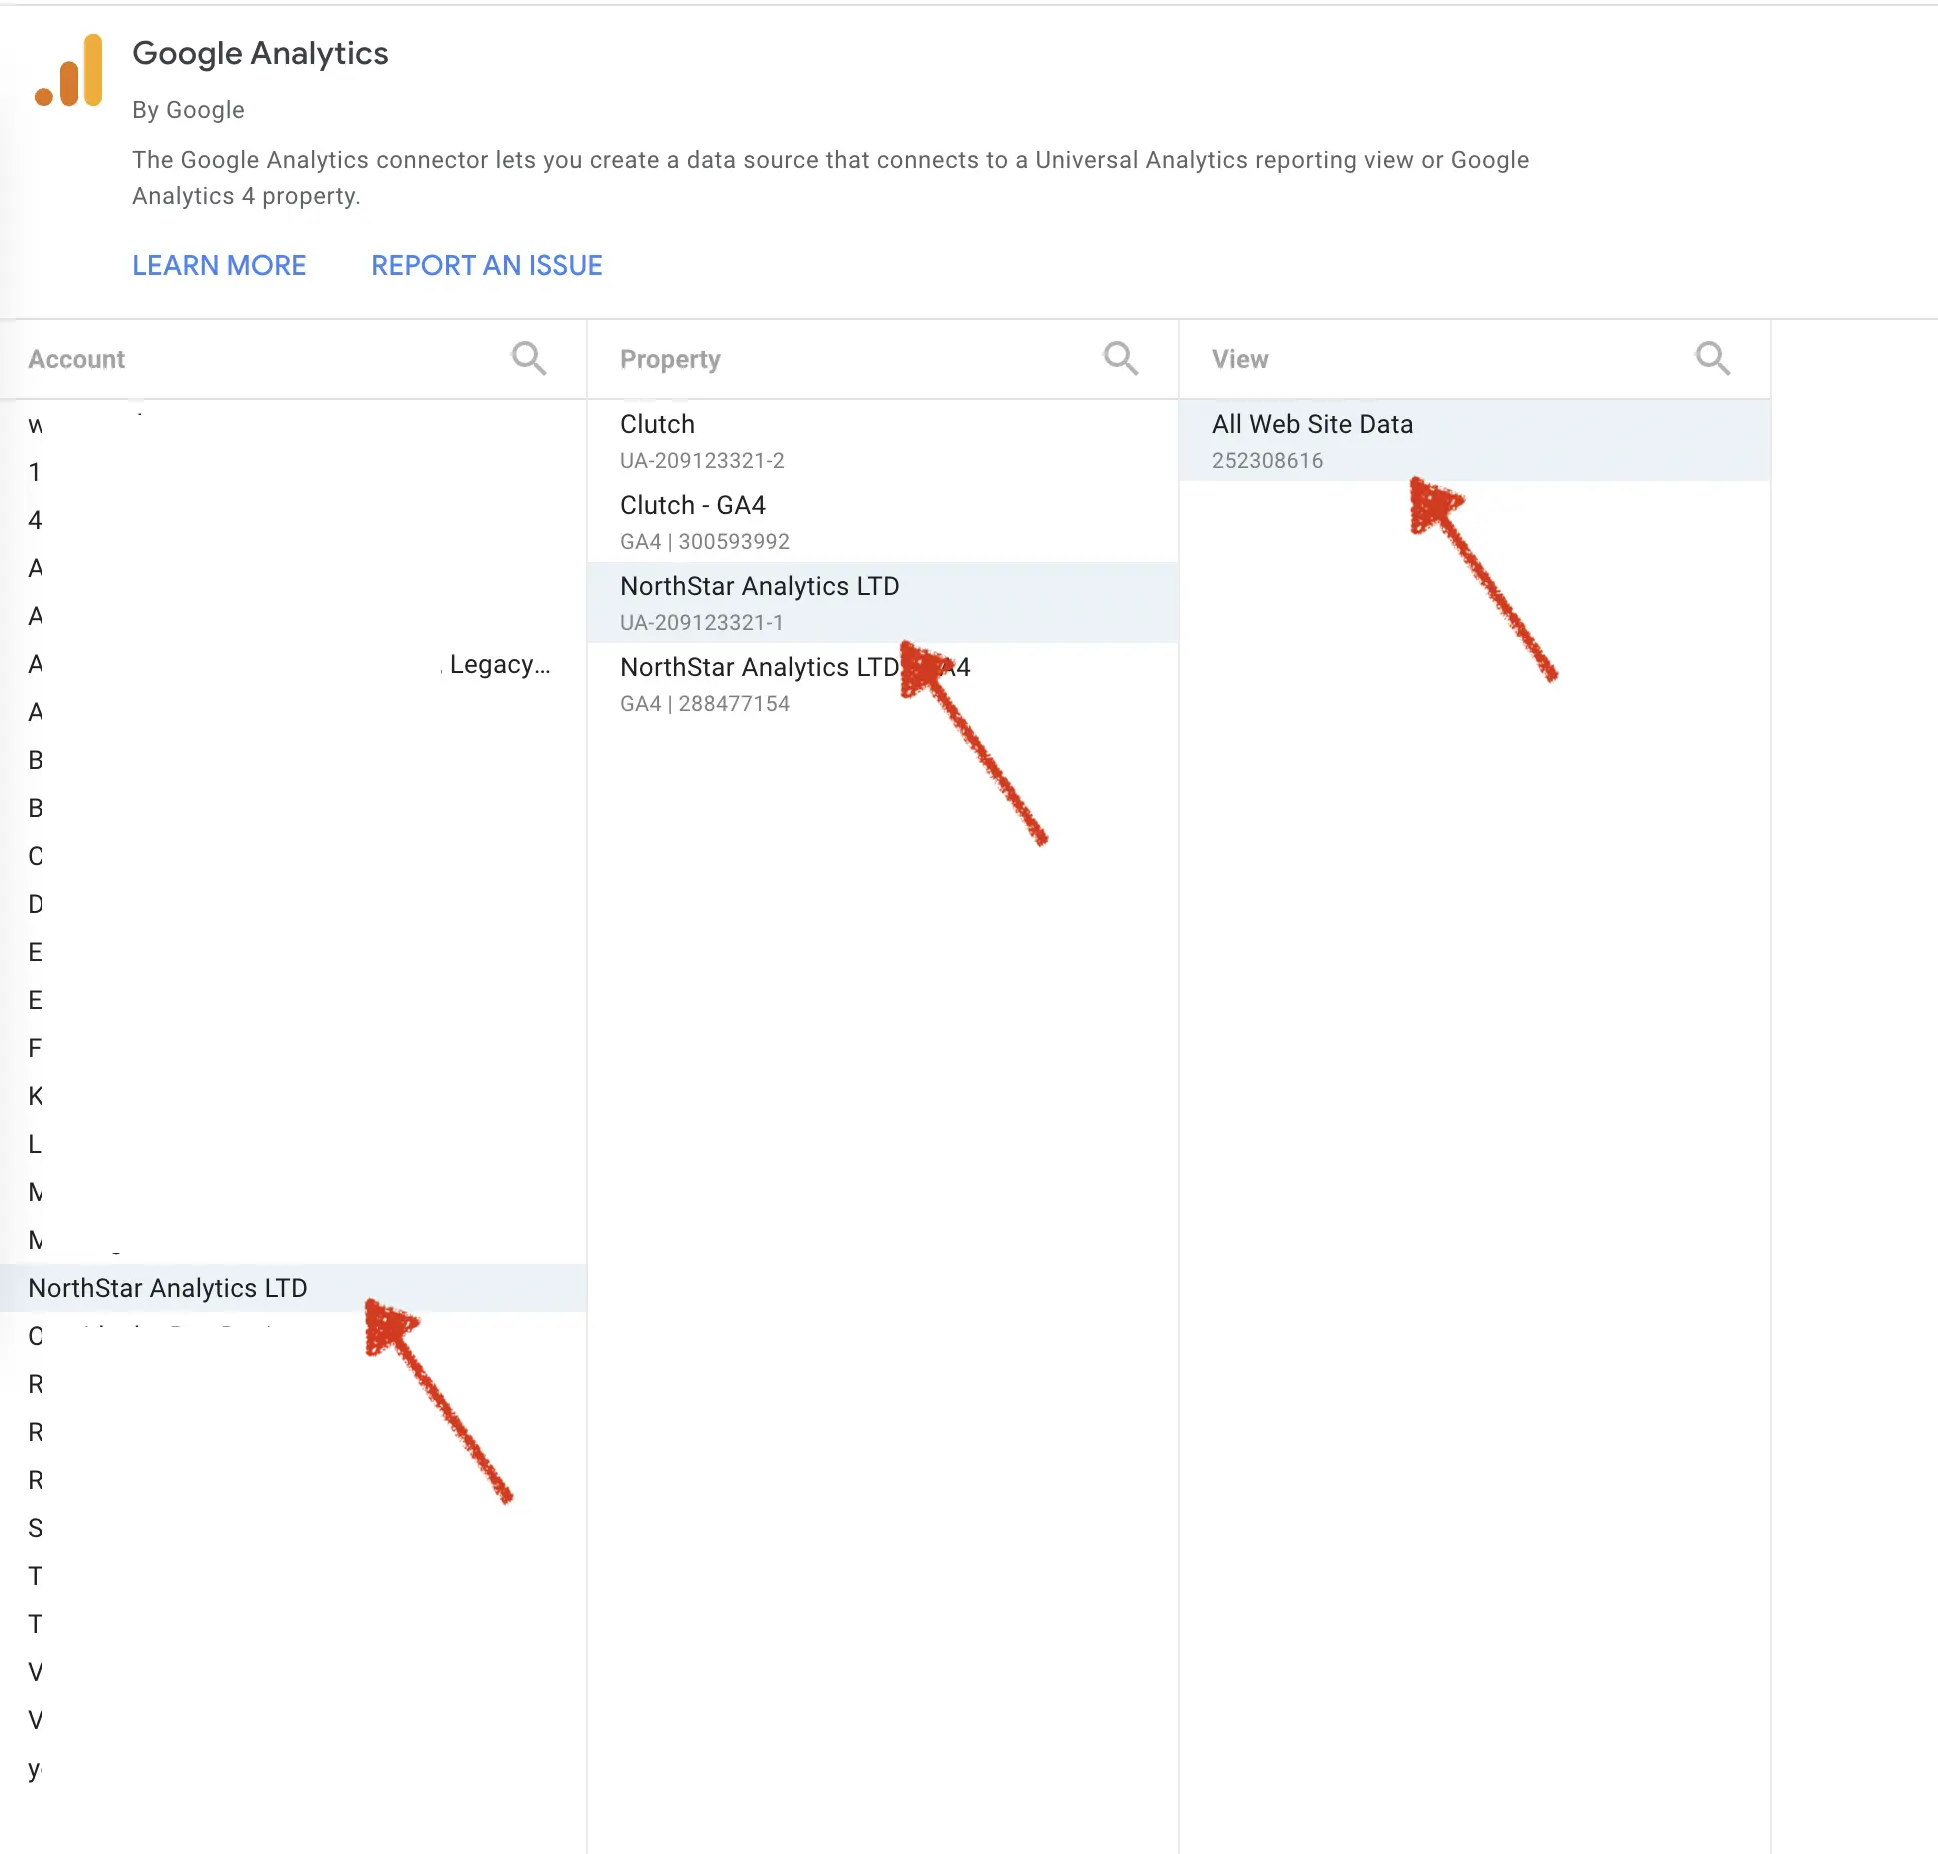
#3 Select the correct view
You should connect the Google Analytics property and view which has Enhanced E-commerce data in it.
Add to Report
You’ll see all the metrics and dimensions on this screen. No need to change anything. Please use the top right “Add to Report” button.

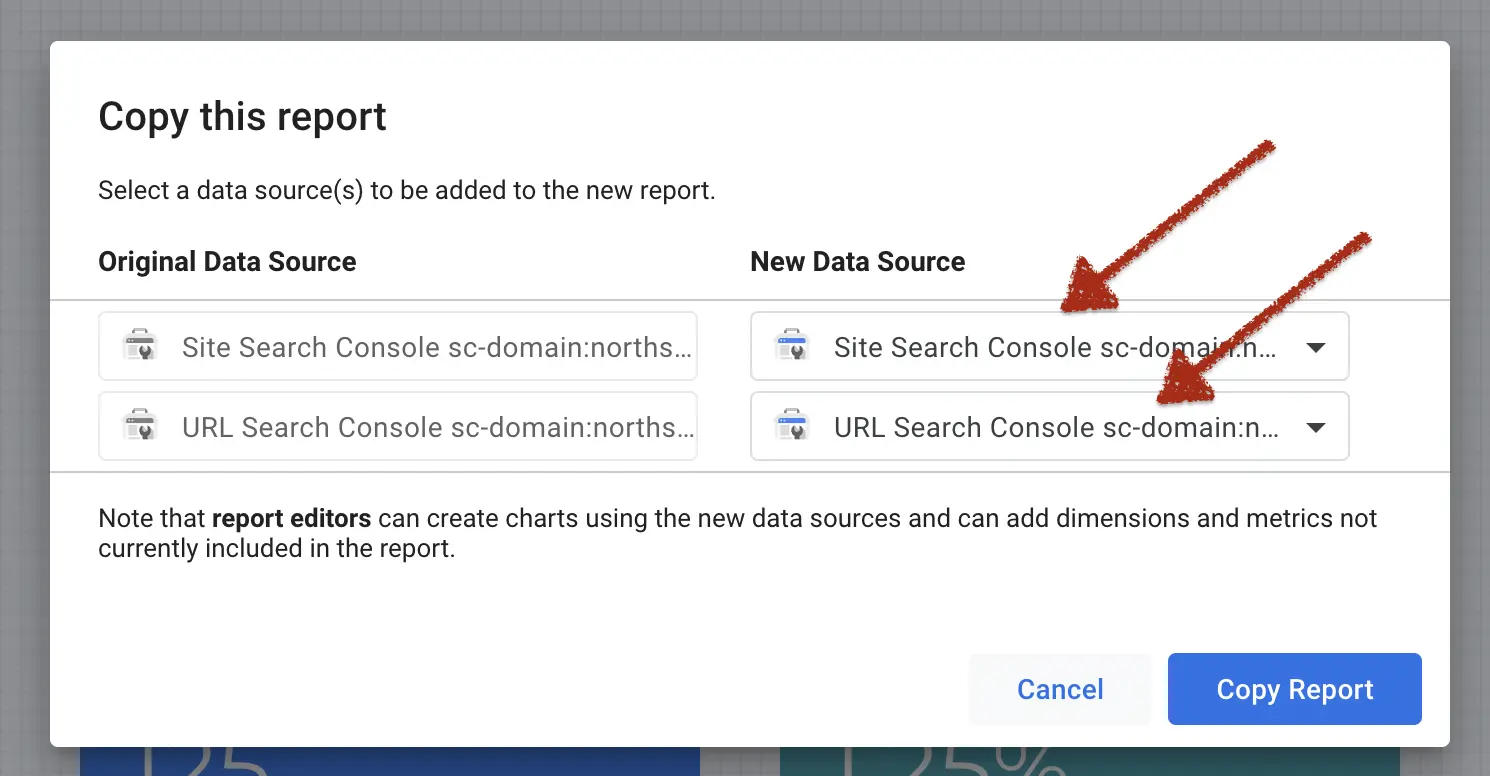
Final Step
Here is the final step. If everything is set, you'll see the "Copy Report" button in blue colour. This means you are ready to copy the dashboard. Ready? Click “Copy Report” to copy the entire dashboard to your own data.
The first screen shows Google Ads while the second represents Search Console.

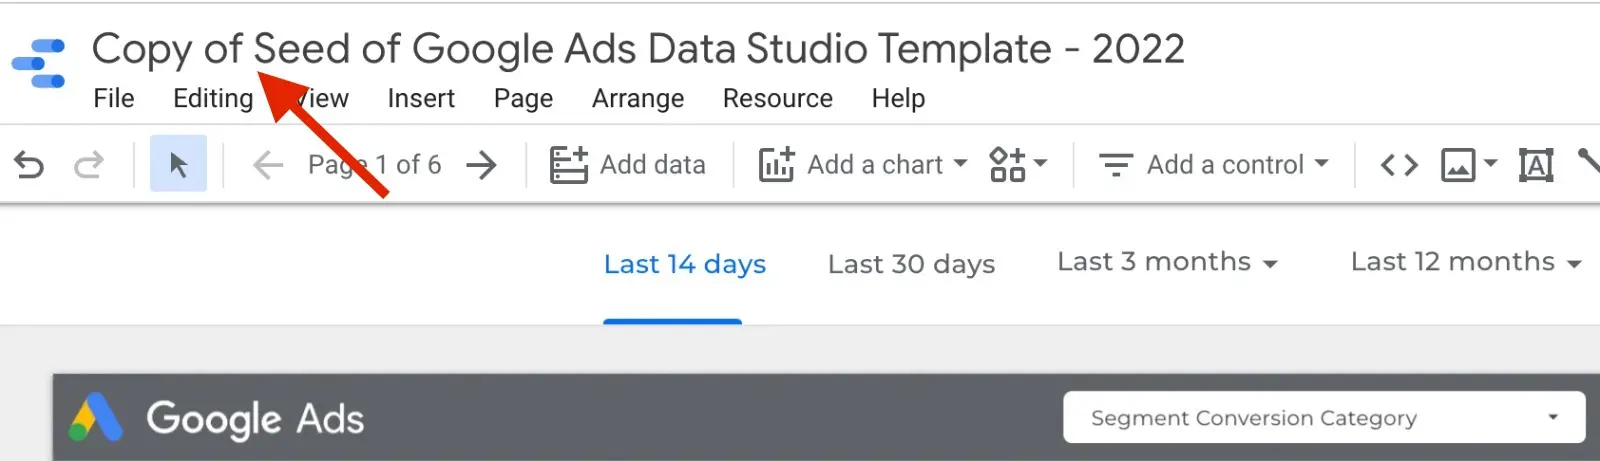
Congratulations! It is time to change the dashboard name with your own taste by clicking ON the dashboard name.


![Working with Google Data Studio Filter [Guide]](/content/images/size/w720/2022/02/Filters.svg)


