How to create a pivot table in Google Sheets?

The pivot table eliminates the complexity of the data by making it more categorical. You can make your multi-column table more readable. Do not assume you will have a hard time categorizing it. If you have decided to make a pivot table, Google Spreadsheets has already suggestions for you. If you want, you can go through it too. Let's take a closer look at it with an example.
How to create a pivot table?
You need to decide on the data wanted to summarize to create a pivot table.
- Select the cell range you want to create a pivot table for
- Menu-> Insert->Pivot table
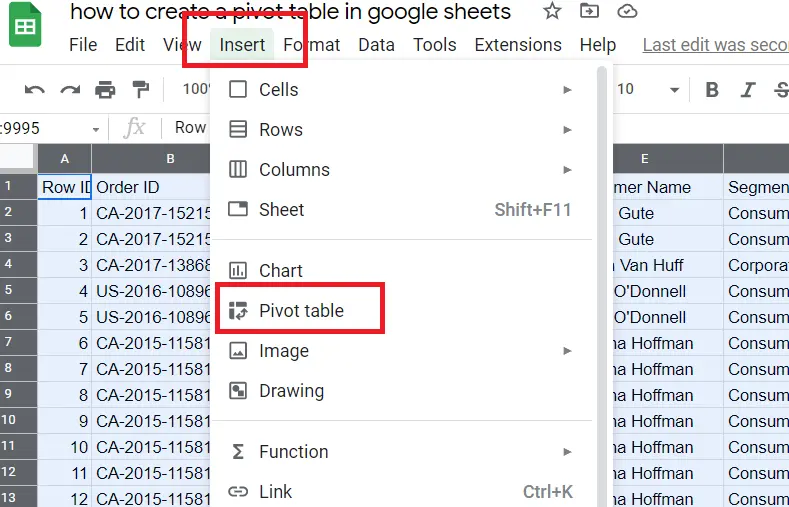
Let's analyze the screen that shows up after selecting the pivot table.
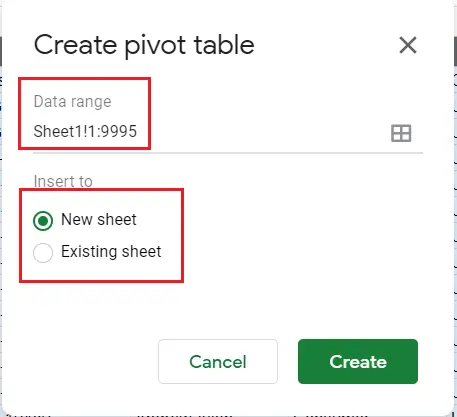
We can change the range for our pivot table with 'data range'.
- New sheet-> Makes the pivot table a new sheet.
- Existing sheet-> Uses the current sheet.
Let's get started by choosing to create a pivot table on a new page.
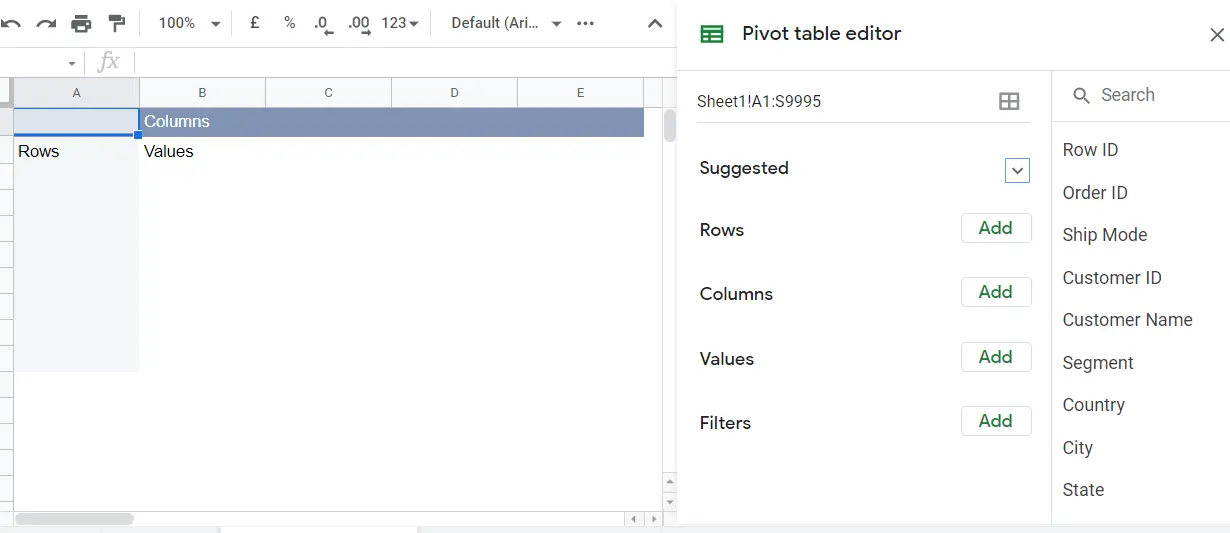
How to create the suggested pivot table?
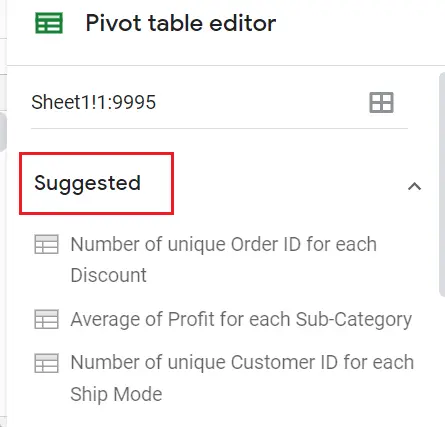
Google Sheets evaluates the data in the table, and offers suggestions for its own summary table:
Based on the supermarket data I have;
- Number of unique order id for each discount
- Average of profit for each sub-category
- Number of unique customer id for each ship mode
As we can see, useful and logical suggestions were made. I am attaching the dataset I used. You can follow the steps, and take a closer look at the recommended list.
How to create a manual pivot table?
If the suggested list does not meet your wishes, you can also follow the steps below to create a pivot table.
- Select the data range you want to make a pivot table
- Menu->Insert->Pivot table
Choose -> new sheet and continue. (You can continue from the current page if you want->Existing sheet)
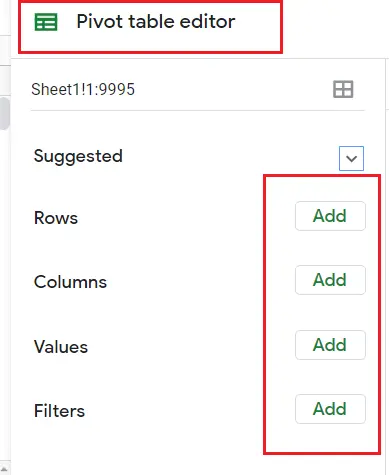
Here you can choose the row, column, values, and filter range for your summary table. Let's analyze them one by one.
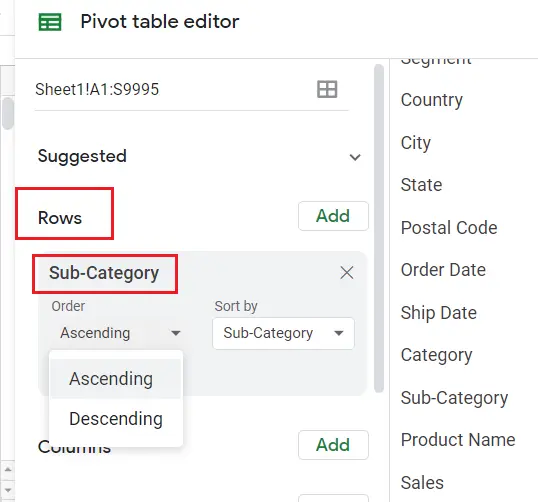
Rows ->Add, we can assign the variable to the row as we want. It can be a variable or more than one variable.
We can also determine the order of the variable we assign.
Order-> Ascending or Descending
After specifying the order for the rows, we can show the grand total if we want.
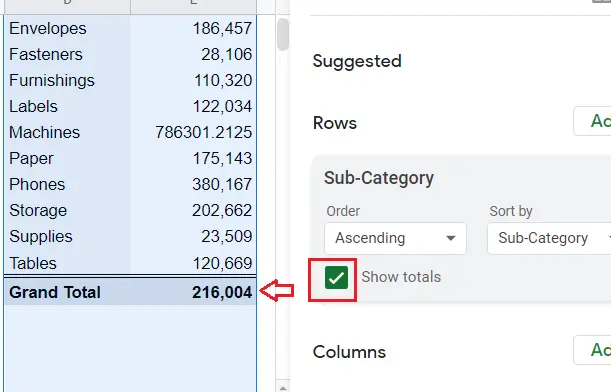
Columns->What we did for the row applies here as well. With 'Add' we can add the variables, specify the order and get the grand total.
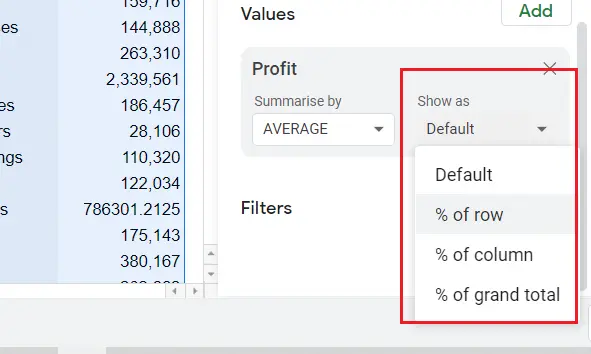
Values->Here, unlike the others, we have options for how the variable is retrieved.
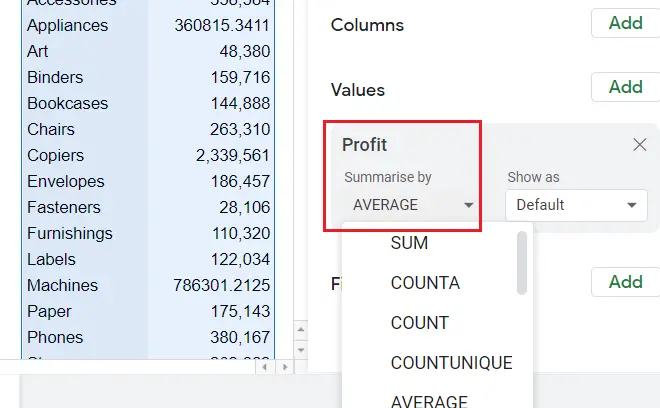
Profit -> We can make the selection depending on how we want it to appear in the Pivot table. Sum, Average..
Show as->We can show it by row, by column, or as a percentage of the grand total.
Filters->
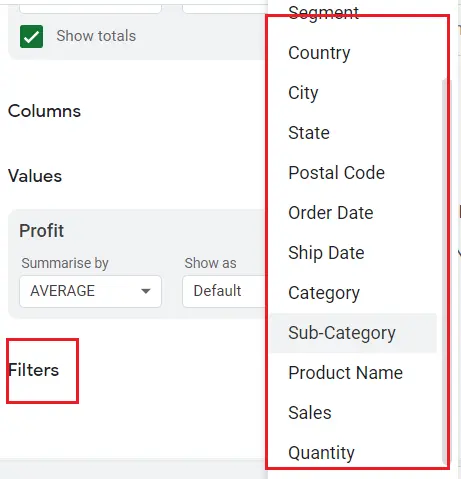
When we select Filters, we can see all the variables. In addition to the filtering according to the variable we choose, we can also add conditions to the filter.
For this -> showing all items
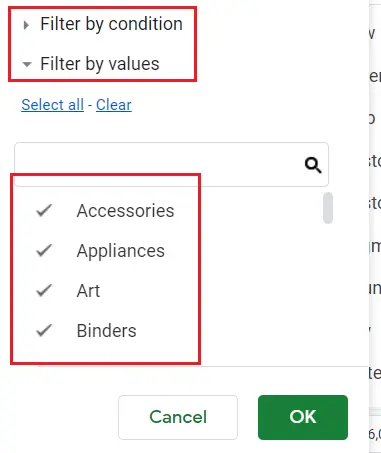
Filter by condition -> We use this to give a condition. We can add conditions such as a certain date range, being above or below a certain value, etc.
For more detailed information, please find this article: "How to highlight duplicates in google sheets?".
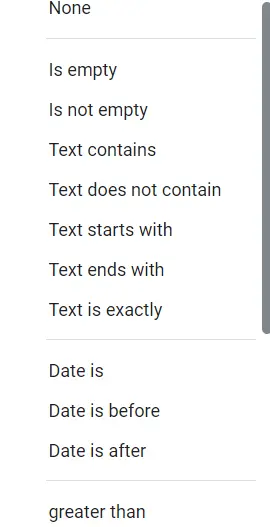
After filtering, our pivot table is ready. We can protect, reproduce and store the page created.
To do this, access these options from 'Pivot Table' at the bottom of the page. Created a new page named 'pivot table 1' next to 'Shet1'.(If we created a pivot table on the current page, the 'pivot table' page would not be created.)
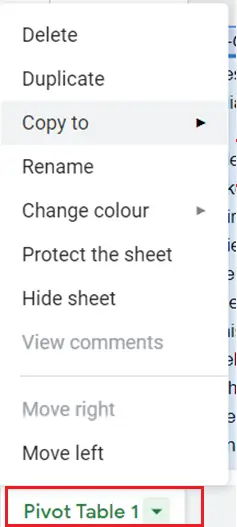
Copy to->You can create a copy on a new or existing page.
Rename-> You can give a new name to the pivot table page.
Change colour -> If there is more than one pivot table page, you can colour them all separately. The place where the page name is written is coloured.
Protect the sheet->You can lock the page. Thus, no one can make changes to the page. Or you can give permission for specific people.
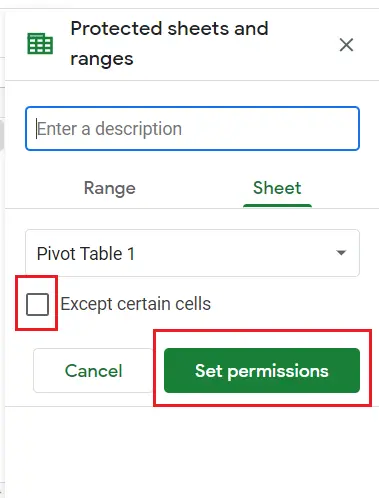
You can lock the whole sheet, as well as lock certain cells or leave some cells open
with 'Except certain cells'
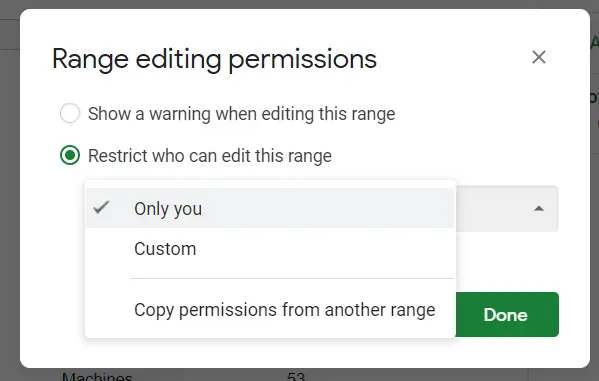
Set permissions-> You can set permissions here. If you want to be the only one making changes, select "only you". With the Custom option, you can enter the e-mail addresses of the ones allowed to make changes.
For the detailed article about it, please have a look at "How to lock cells in Google Sheets?"


