How to create Measures in Power BI Desktop?

In Power BI Desktop, Measure may be utilized to build some of the most powerful data analytics solutions. Using measures, you can engage with your reports by running computations on your data.
Calculations in calculated columns appear in the column but not at the Measure. We snapshot data in Measure via visualizations in the report view.
Measurement calculations are completed once and then used as needed. Until there is a change in the chart or sheet, the measures are not recalculated.
How do you create your measures?
In most cases, Power BI Desktop generates and returns data depending on the fields and aggregations you select. However, you may want to establish your measures in some circumstances to execute more intricate, one-of-a-kind calculations. You can utilize the Data Analysis Expressions (DAX) formula language to create your measurements in Power BI Desktop.
DAX formulas use many functions, operators, and syntaxes found in Excel formulas. However, DAX functions are built to handle relational data and execute more dynamic calculations when interacting with your reports.
Many DAX functions are available, ranging from simple aggregations such as Sum and Average to more detailed statistics and filtering operations.
For more information on the DAX, visit here.
When you construct your Measure, it's referred to as the model measure and added to the table's Fields list. Model dimensions have several advantages, including the ability to name them whatever you want, making them easier to recognize, and the ability to utilize them as arguments in other DAX expressions, allowing them to do complex computations rapidly.
What is a quick measure, and how is it created?
Many common calculations can be used as temporary measures that write DAX formulas for you based on your entries in a window. These quick and powerful calculations are also ideal for learning DAX and constructing the foundation of your own customized measures.
Make a quick measure with one of the following methods:
- Right-click or choose More options (...) in a table in the Fields pane, and then choose New quick measure from the list.
- Under Calculations on the Home tab of the Power BI Desktop ribbon, choose New Quick Measure.
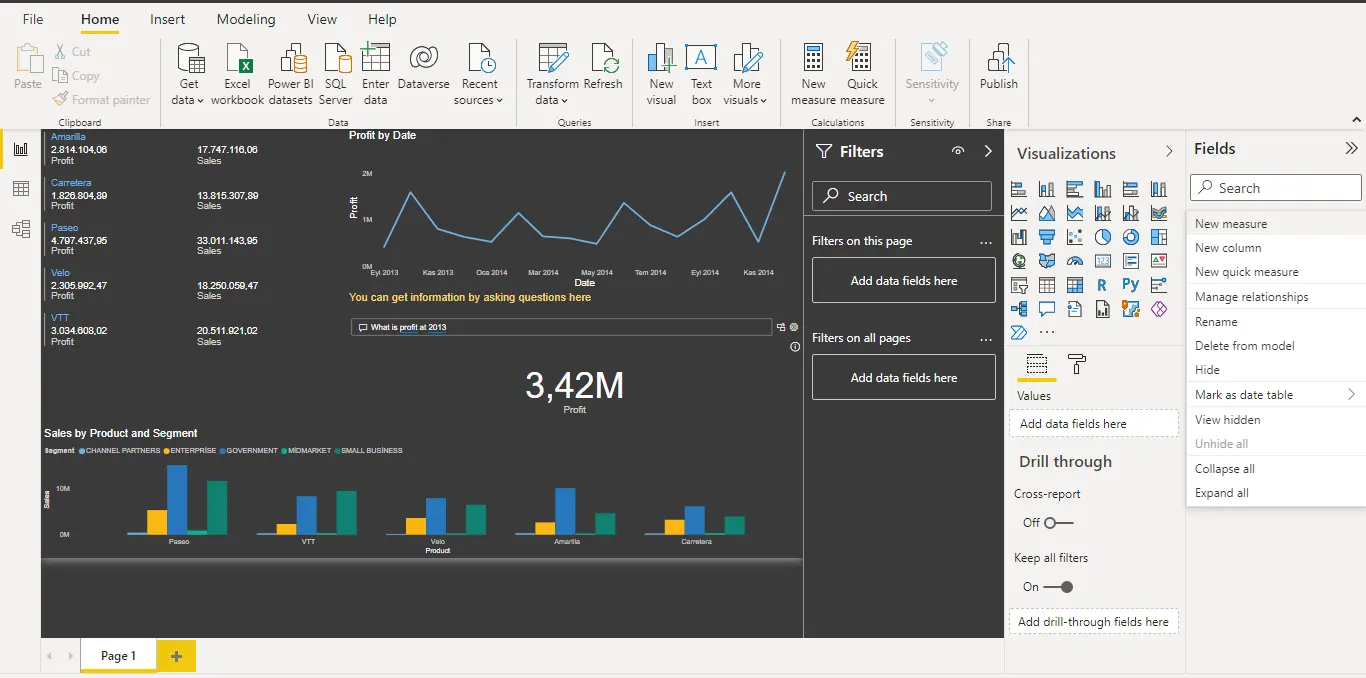
How is the measure created?
Follow these steps to make a measure:
- Select More options by right-clicking or hovering over your table in the Fields window (...).
- Select New measure from the option that opens.
To create a new measure, you may alternatively choose New Measure from the Calculations group on the Home tab of the Power BI Desktop
ribbon.
At the top of the report canvas, you'll see the formula bar. In this section, you can change the name of your measures and add a DAX formula.
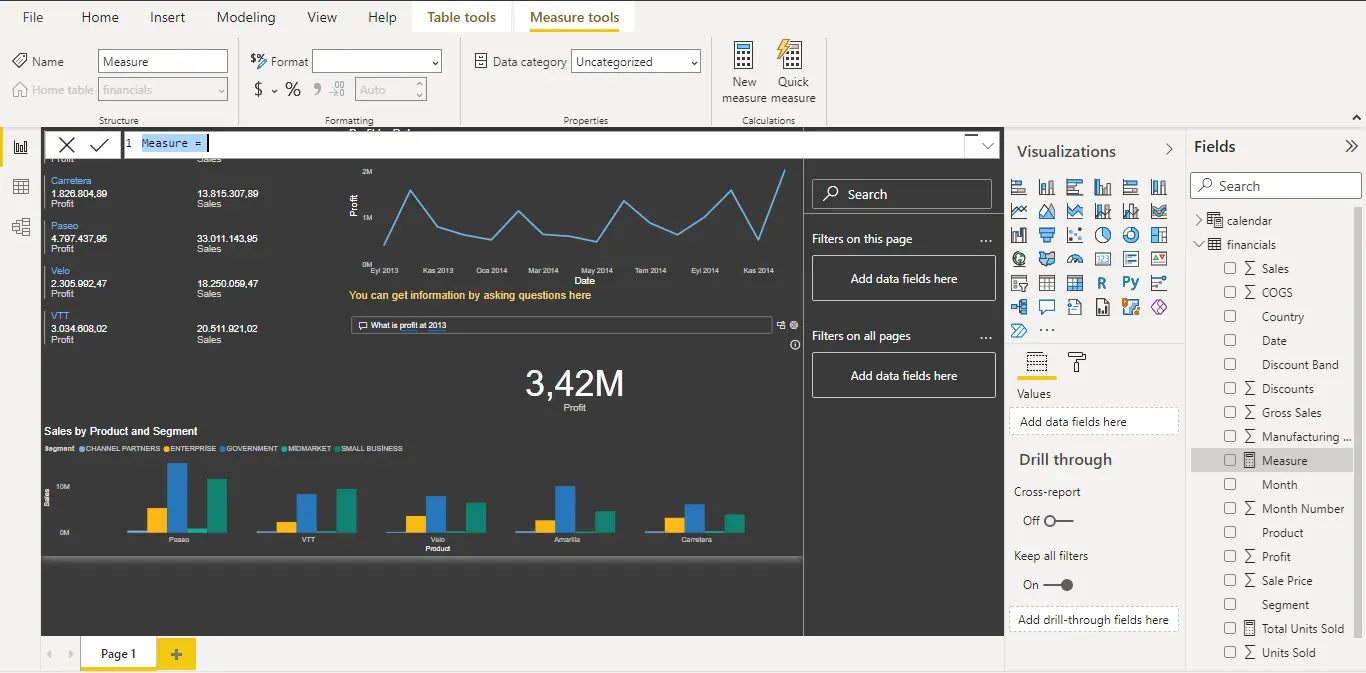
3. The new measures are named Measures by default. If you do not rename it, the next new measures will be called Measure 2, Measure 3, and so on. We name the Measures in the formula bar according to the action we will take because we want your Measures to be easier to define.
4. Begin by entering your formula. Begin writing the necessary DAX function for your operation after the equal sign. A drop-down menu of DAX functions that starts with the letters you write appears as you type. Scroll down the page if necessary, select the function from the list, and press the Enter key.
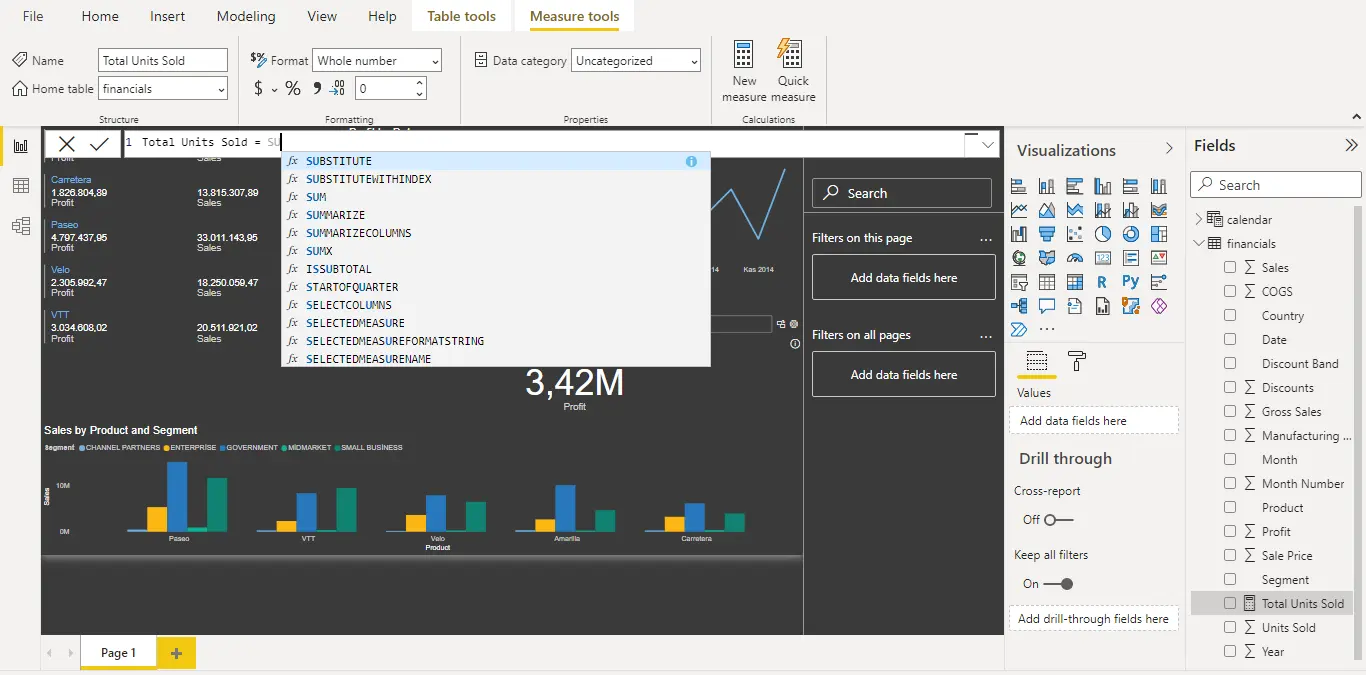
An opening brace and available columns display in a drop-down suggestion list that we can supply to the function's function.
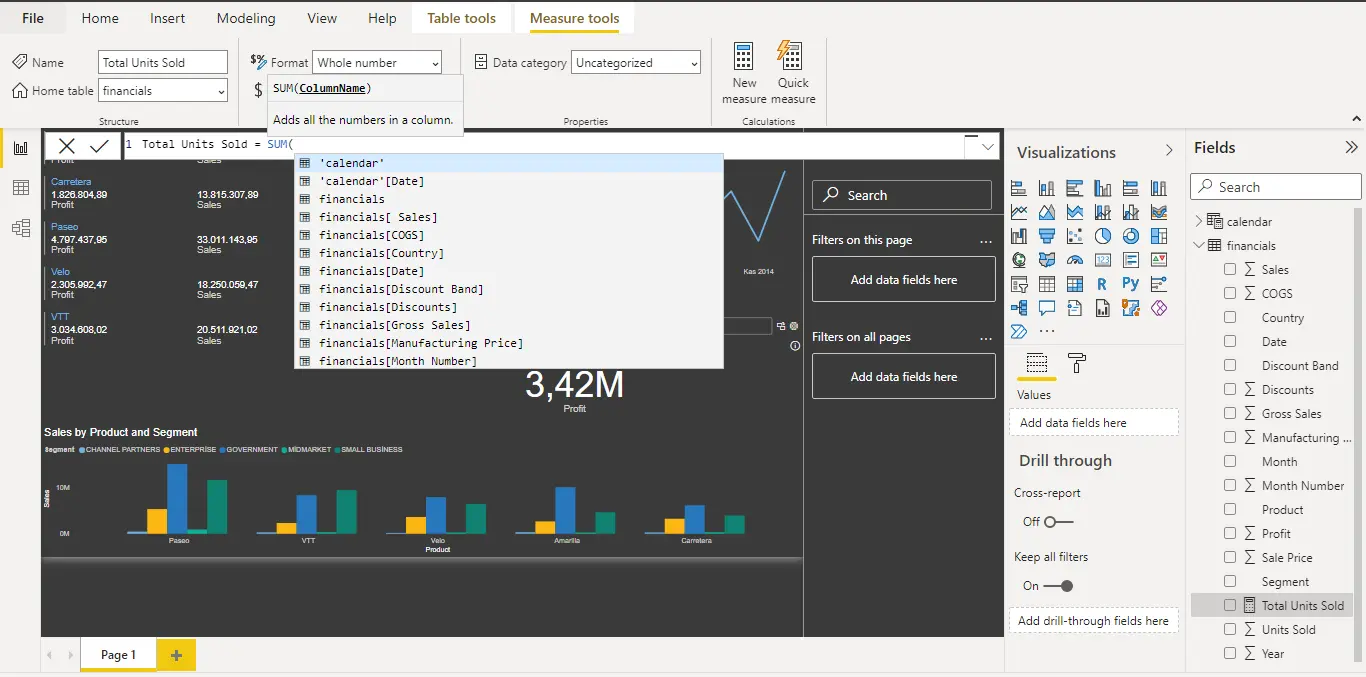
5. Expressions are always shown between an opening and closing brace.
The full name of the column is the column name preceded by the table name. Full column names make your formulas easier to read.
6. Enter a closing brace after specifying the full name of your column from the list.
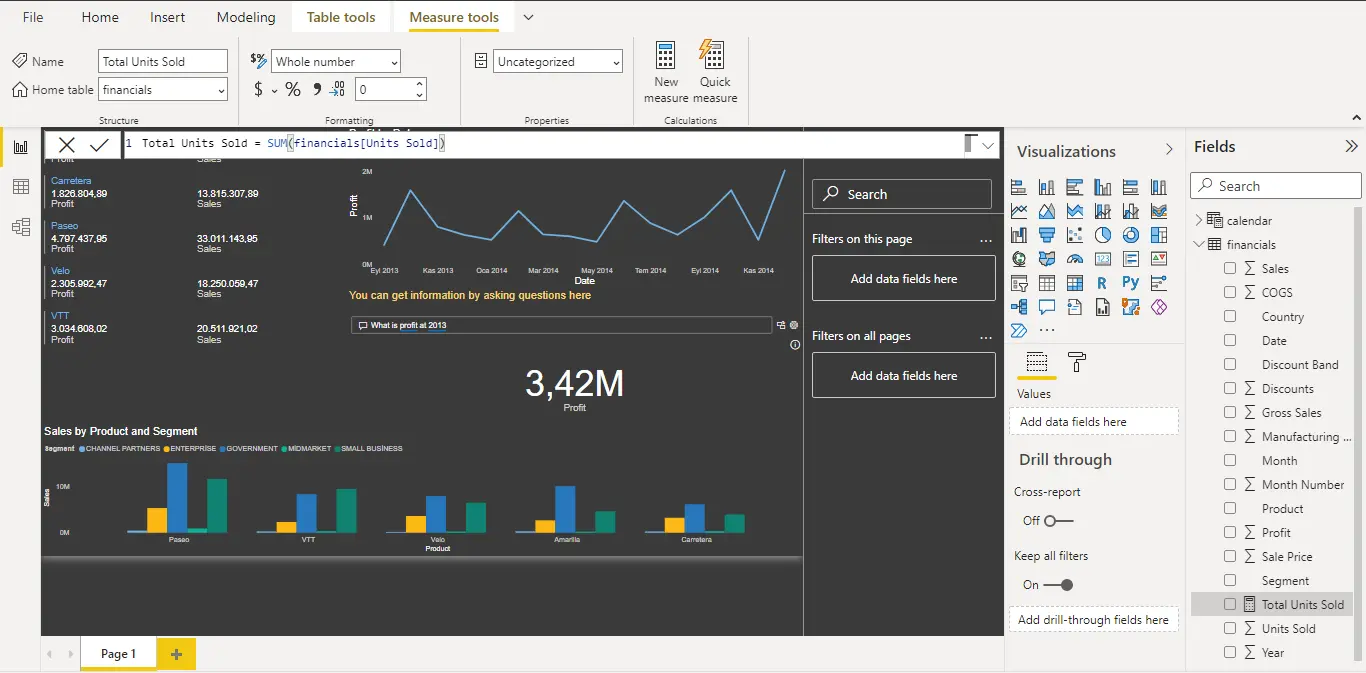
7. To finish and verify the formula, press the Enter key or click the checkmark icon in the formula bar.
In the Fields pane, the confirmed measure is now available for usage.


